Contents
We all know that Shopify is a big name in the ecommerce industry, but did you know that Kylie Cosmetics, Victoria Beckham, Netflix shop, LongChamp Paris and many other big brands, including Red Bull, run their ecommerce business on Shopify!
From 2006 to 2025, Shopify has come a long way. What started as an online platform to sell snowboards and related equipment has now become one of the most popular cloud based ecommerce web-building platforms, contributing to generating more than $700 billion in total sales.
So if you are someone who is planning and searching about how to start a Shopify store, or how to set up a Shopify store, then this guide will definitely help you. Shopify has more than 4 million active websites and you can also be a part of this number.
We have explained every step in this blog so that you can easily set up your Shopify store from the beginning and avoid common mistakes when starting a Shopify store. Just follow this step-by-step Shopify store setup guide and you will be all ready to launch your business.
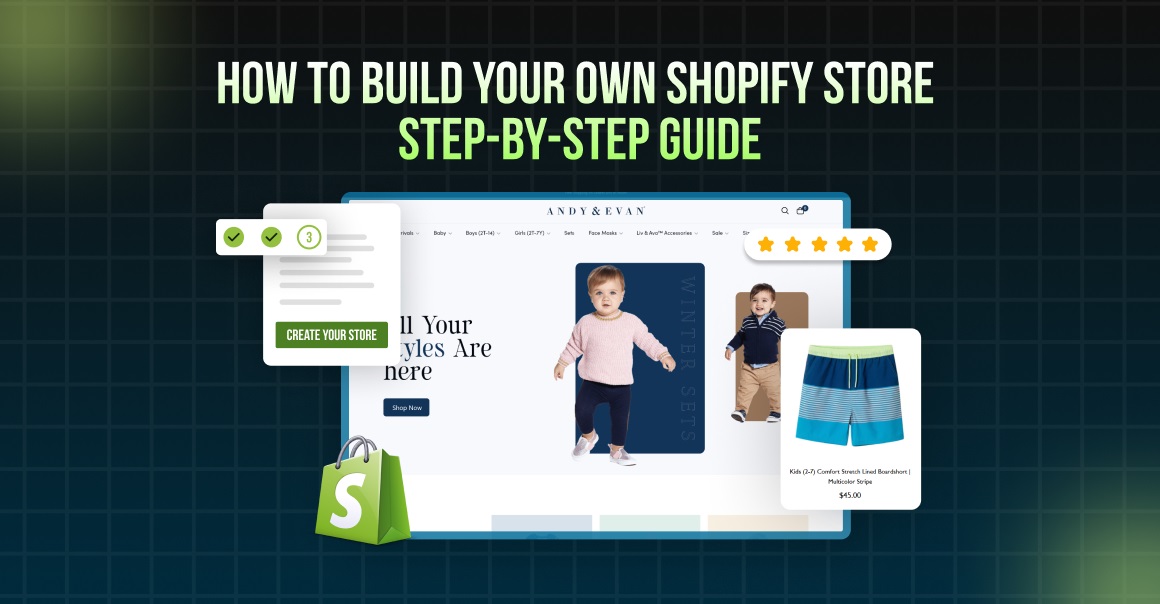
How to Set Up a Shopify Store in Easy Steps
Starting an online store can feel overwhelming at first because too many ideas, too many tools and a hundred doubts running in your head. But do not worry, we all have to start somewhere.
If you have been sitting on a product idea, now is your time to start your own Shopify store. You don’t need to have everything figured out on day one. You just need to take the first step and this guide will walk you through the rest.
Here is the step-by-step guide on how to build a Shopify store.
1. Create an Account
To build a website on Shopify, you need to create an account on Shopify. Visit Shopify’s website (https://www.shopify.com/) and click the “Start Free Trial.”
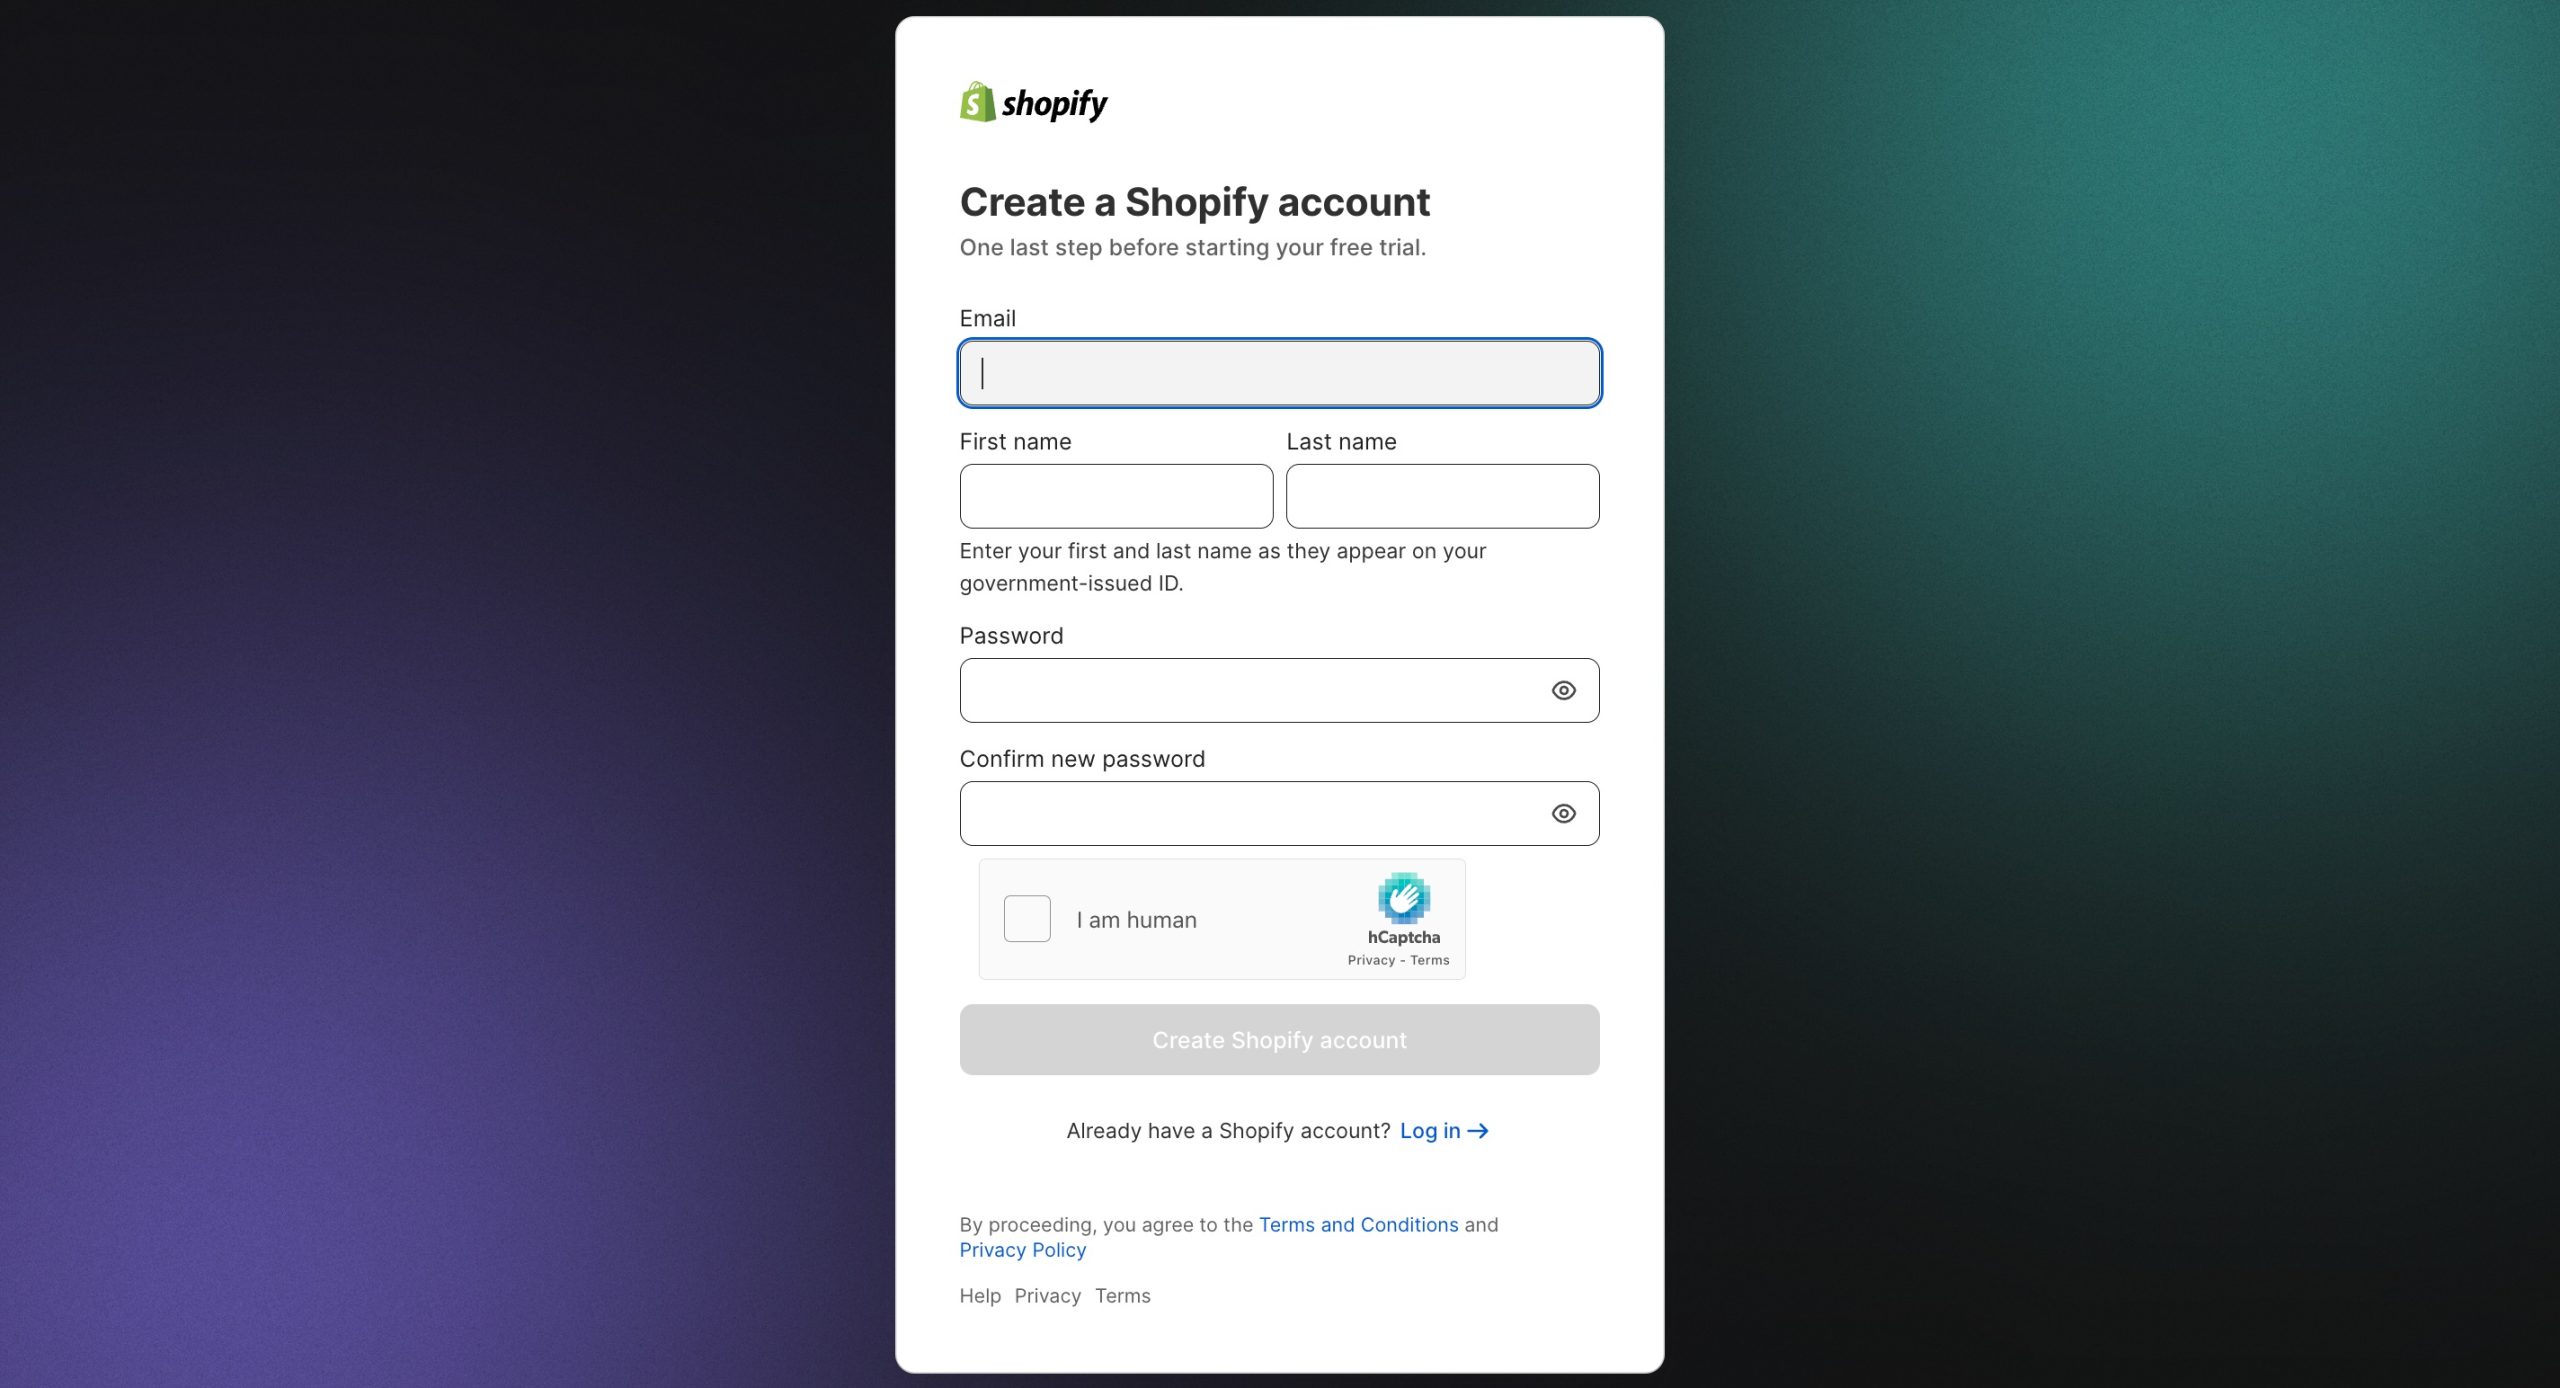
Once you create an account, you will be asked a series of multiple-choice questions. You can choose to select the answer that aligns with your business goal, or you can click on the skip option. We would suggest you answer those questions as it will create a personalized experience.
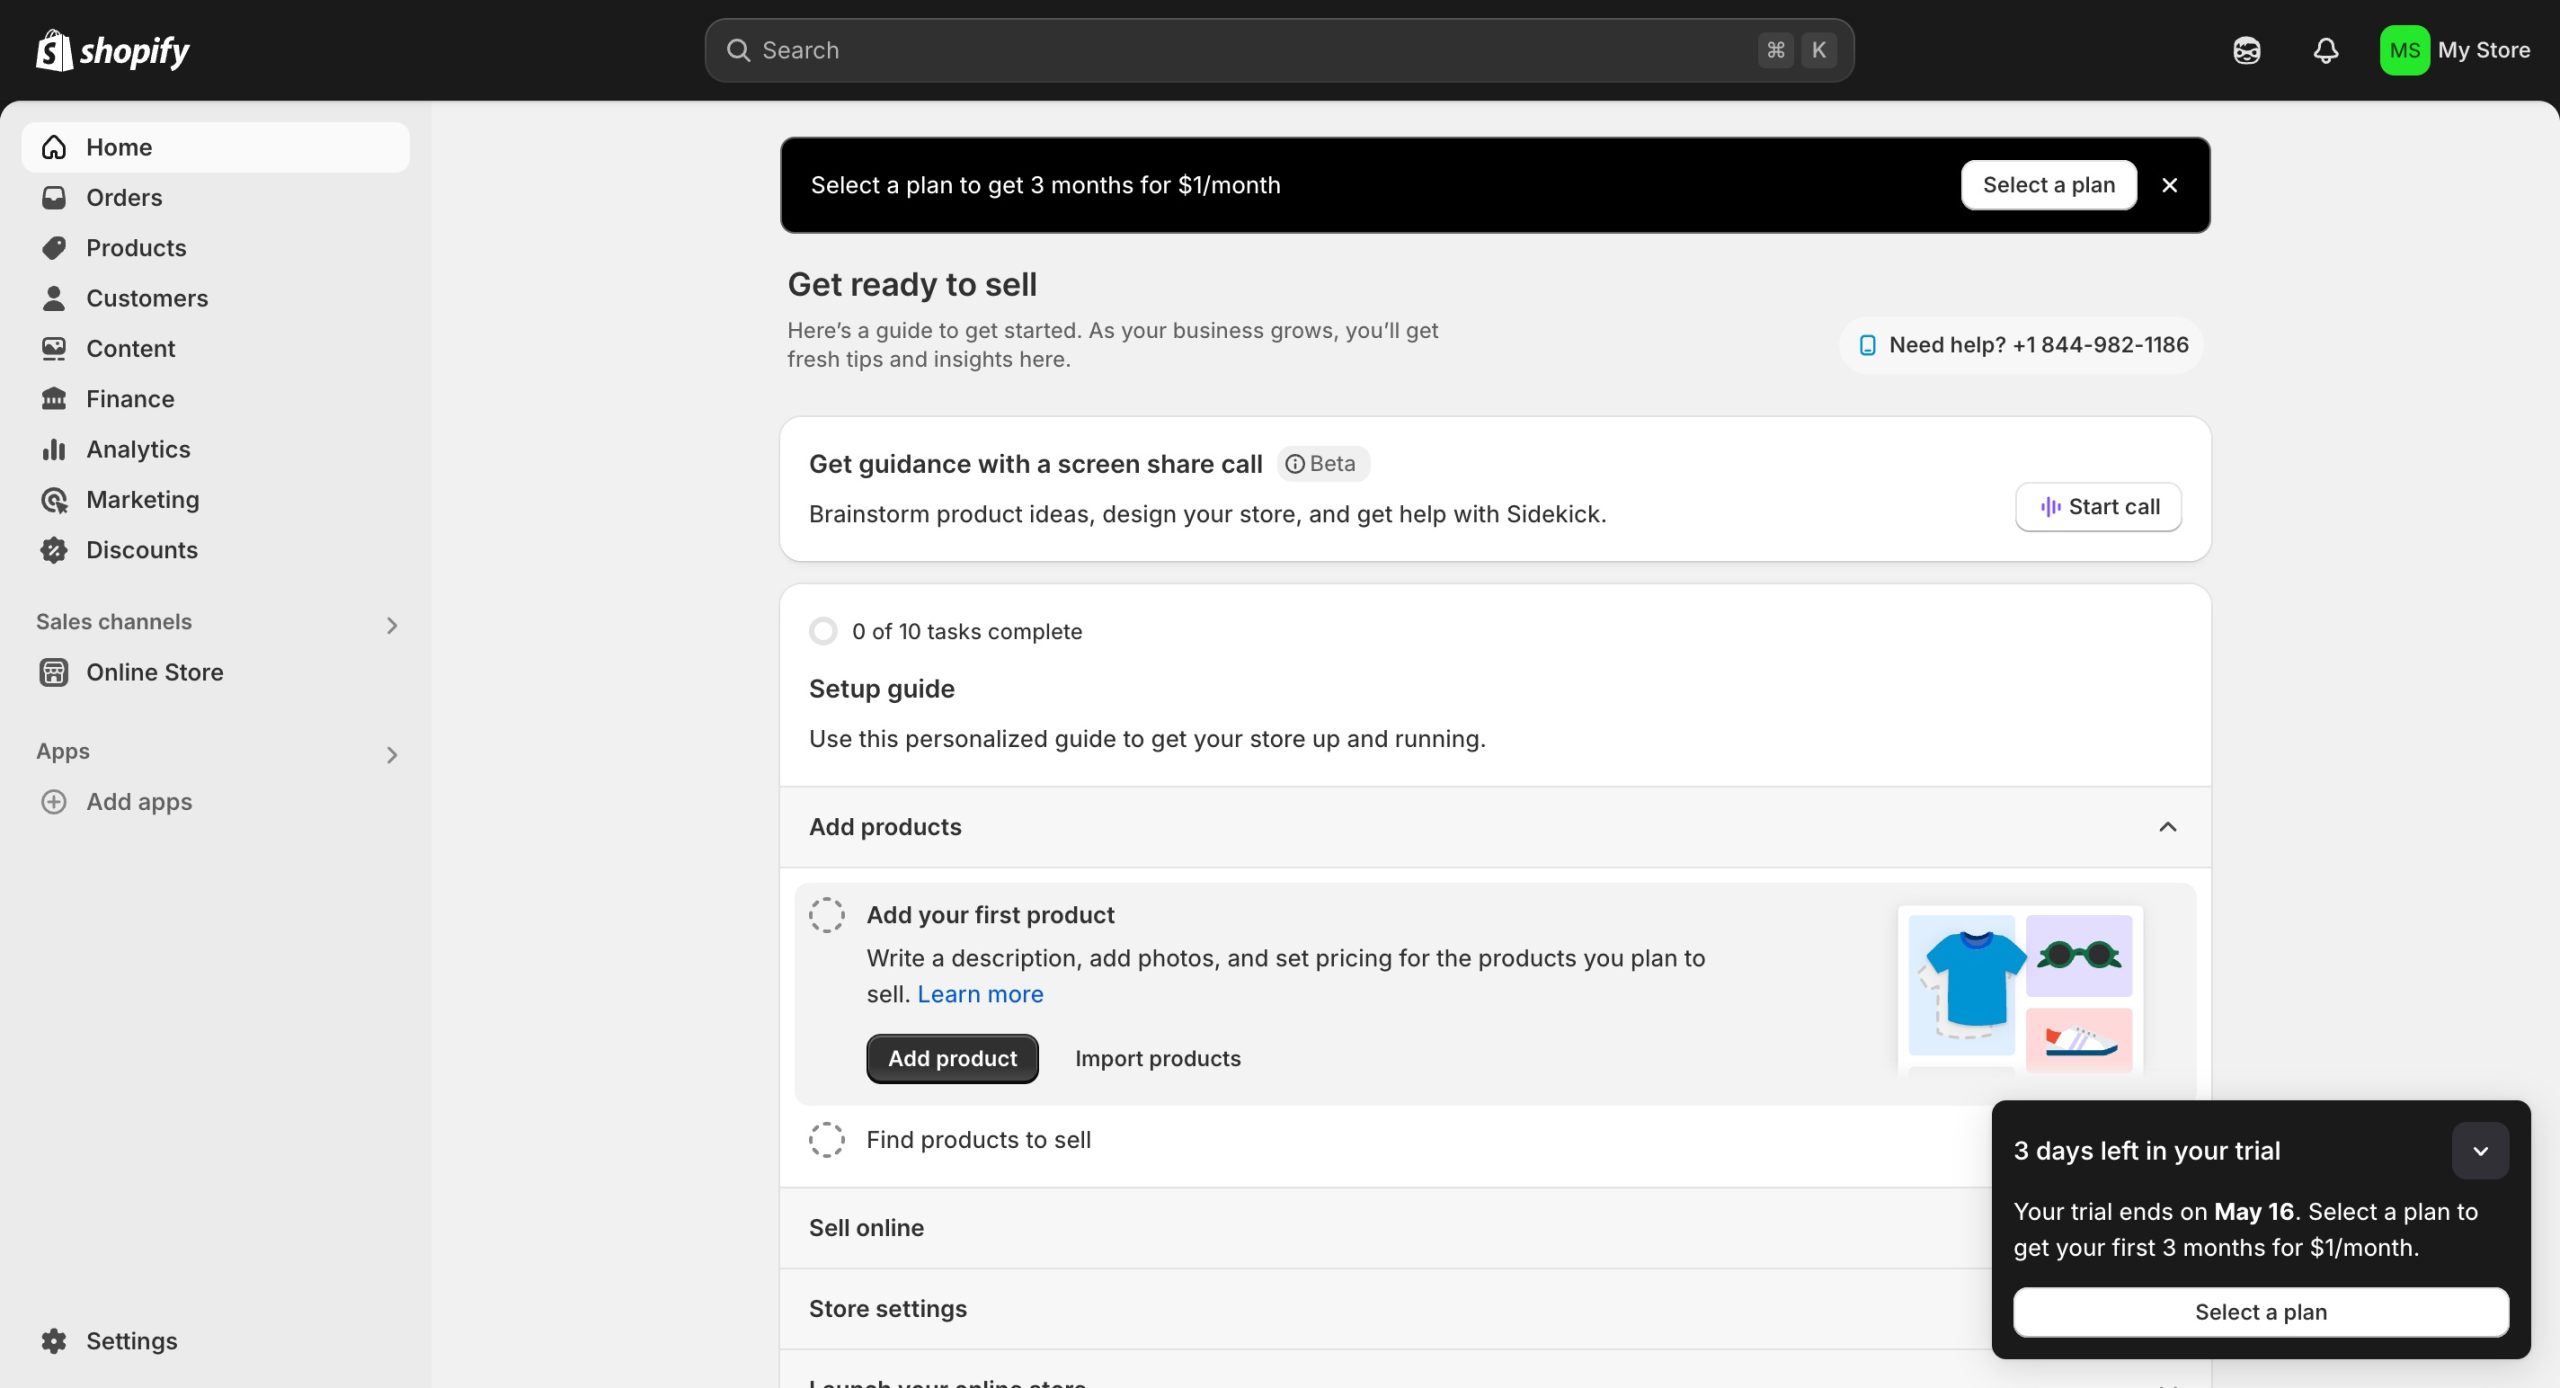
After creating an account and choosing a unique store name, you will be directed to the admin panel, where you can set up your Shopify store and enjoy the 3 days of free trial!
2. Explore the Admin Panel
Admin panel has so many features, you need to understand them in order to create a customized store and adjust the features according to your business needs. Here are the following features you will find on the admin panel:
Ø Orders: All your orders including order fulfillments, cancellations, and reviews, will show up on orders. You can easily manage and view a complete list of your Shopify store’s orders here.
Ø Products: Manage your products like uploading images, product descriptions, and prices. You can easily add and edit your products according to the customer requirements.
Ø Customers: All your customer data can be accessed here. You can easily export the list of registered customers and their contact information.
Ø Content: To engage with your audience you need to have content on your store. Post and manage all the content of your ecommerce store here, as this helps you increase the store’s visibility.
Ø Finances: Financial health of your business is important, and that is why it is important for you to keep track of your Shopify store finances. Check revenue, profits, and expenses, note down everything as this will help you monitor the budget.
Ø Analytics: Track your store’s performance, check sales numbers, revenue, and product performance regularly to keep everything on track.
Ø Marketing: Through Shopify you can easily configure email marketing, Facebook advertising, SMS marketing, social posts, and automated marketing for abandoned carts.
Ø Discounts: Create different discounts, manage discount codes with terms and conditions, such as free shipping on order amounts, buy one and get a coupon, and discounts on certain products.
Ø Apps: There are many apps you will be required to install for your Shopify store to enhance its functionalities. Search for different apps in categories like design, conversion, fulfillment, customer service and more.
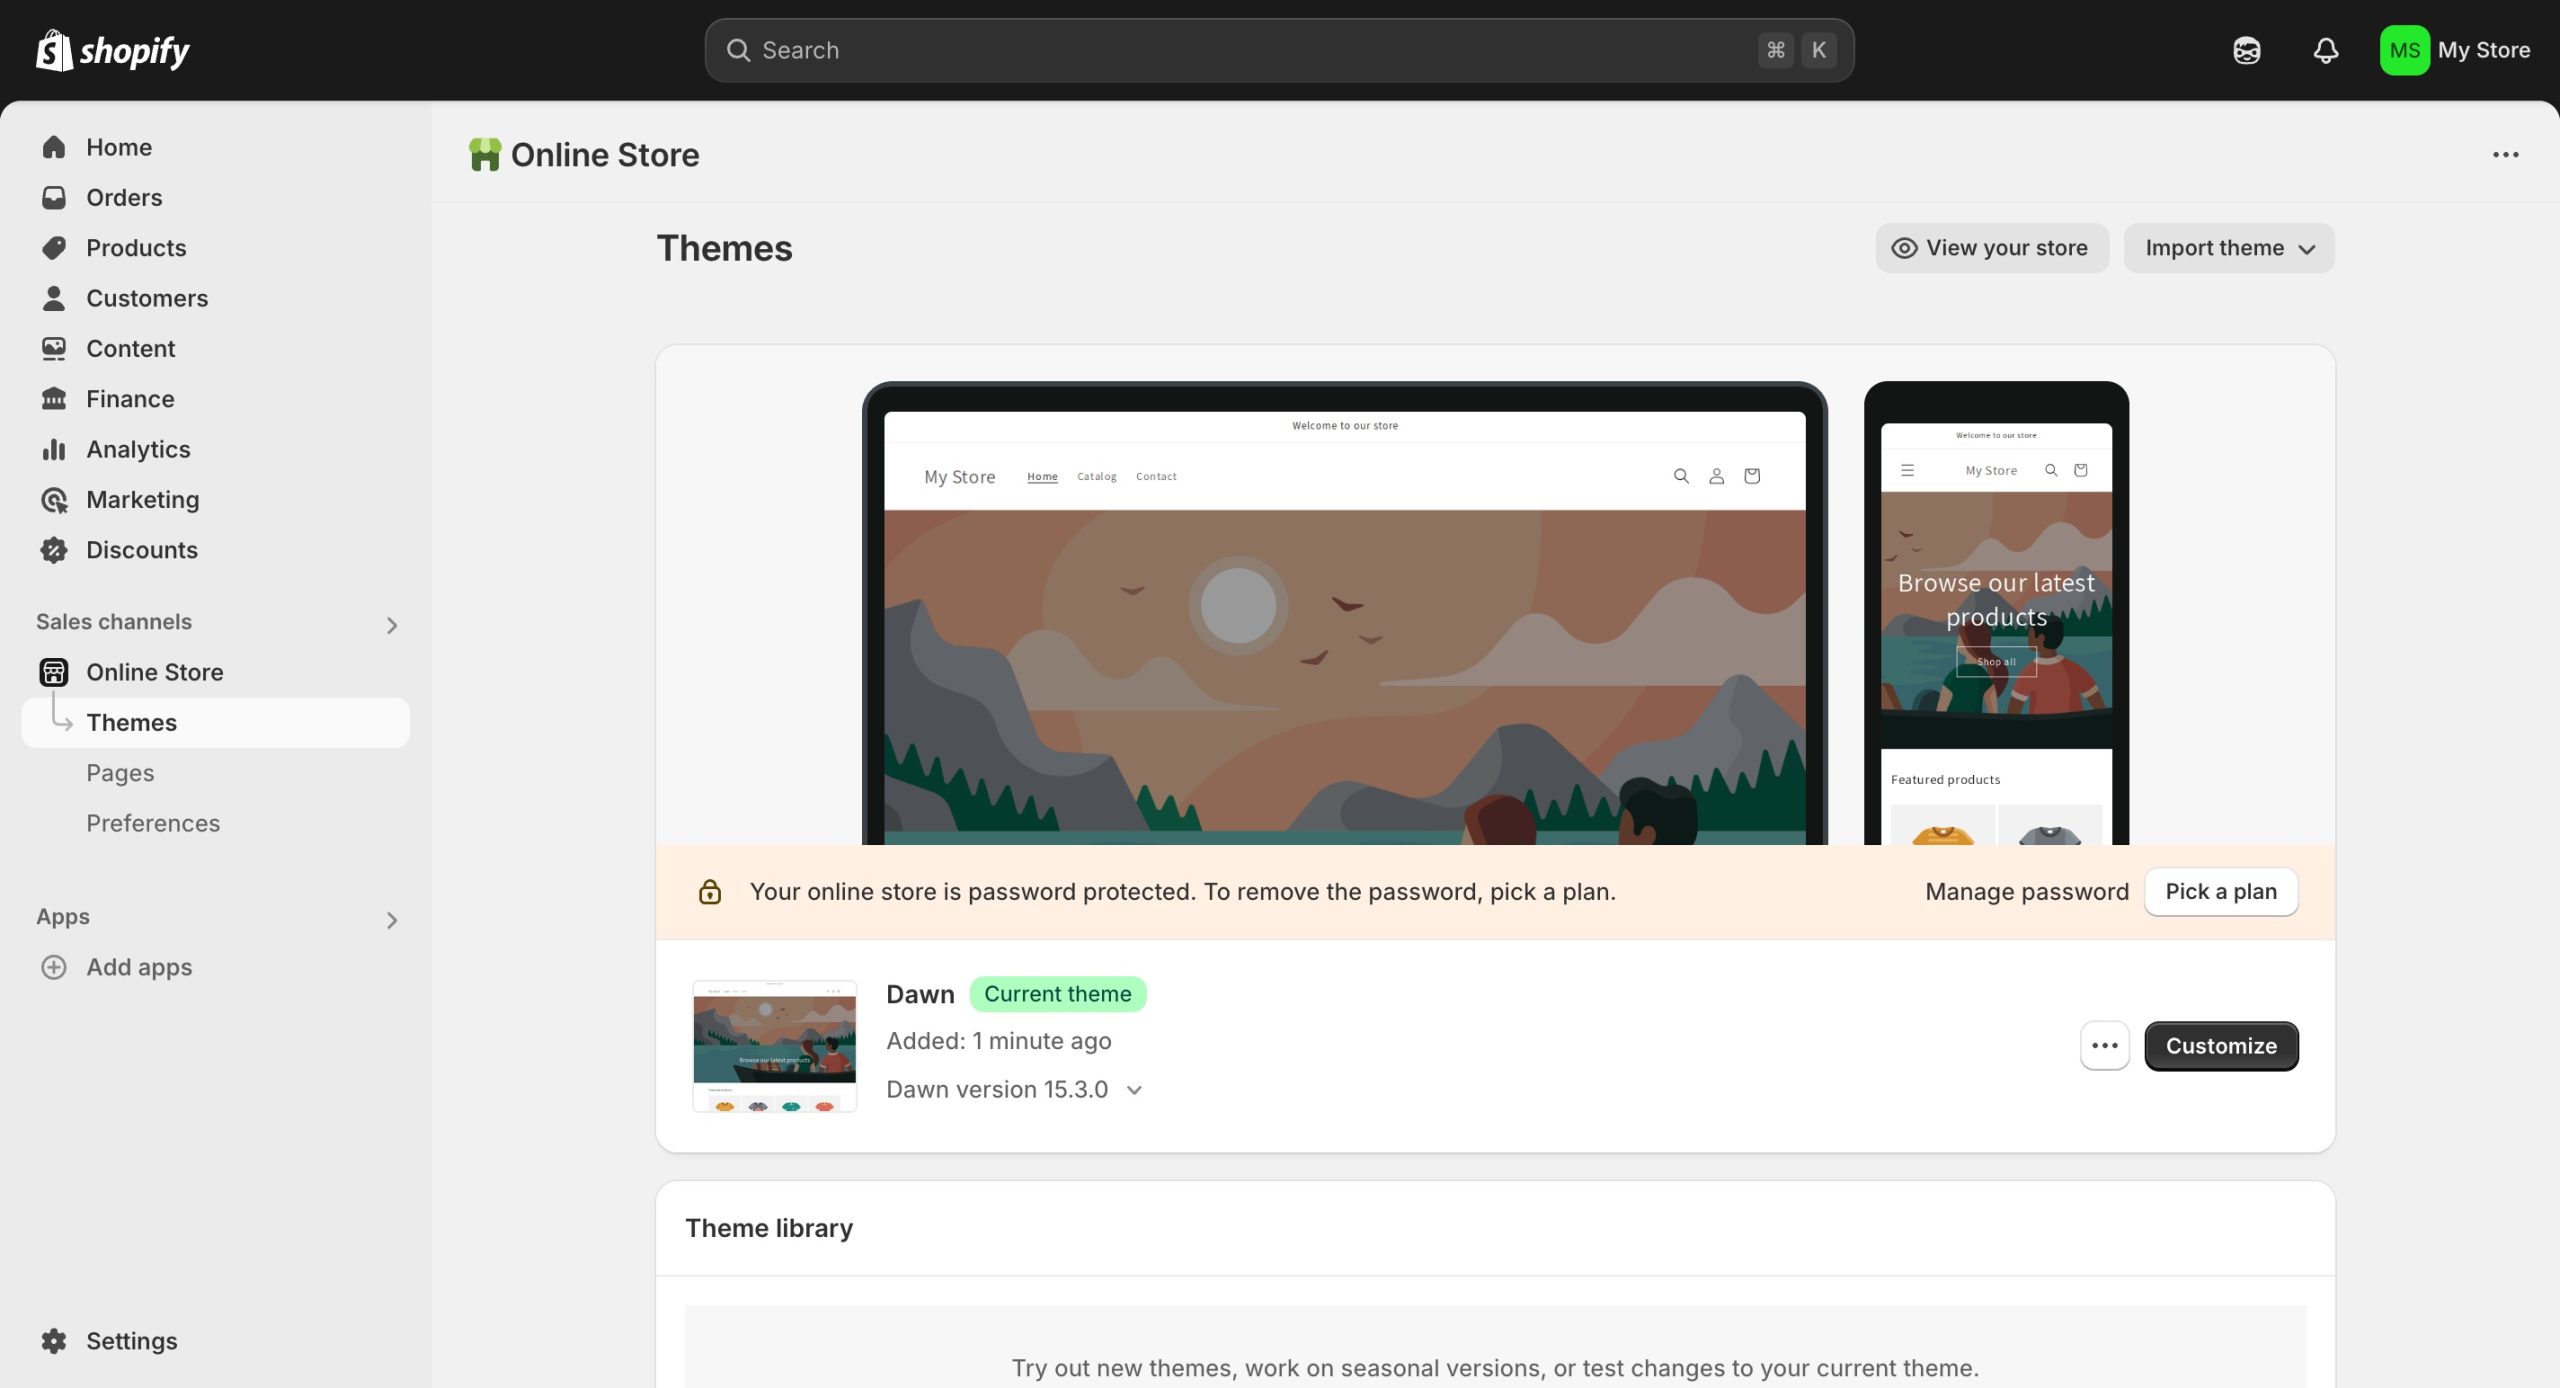
3. Choose Your Theme
A default Shopify theme is already set up on your store when you create a Shopify store account. But you have the liberty to change the theme as Shopify provides various free Shopify themes and paid themes.
- Add your preferred theme to the admin panel, just click on the online store button, and select the theme from dropdown menu.
- Now scroll and go to the Popular Free Themes section and check the best free themes available from Shopify store.
- Decide what theme you want and then click on the Add button, and it will be added to the themes page of your admin.
- Now click on the 3 dots on the theme library block and click the preview option, this will show how your theme will look.
When you plan to build a high-converting Shopify store for a fashion brand, the theme plays a very important role.
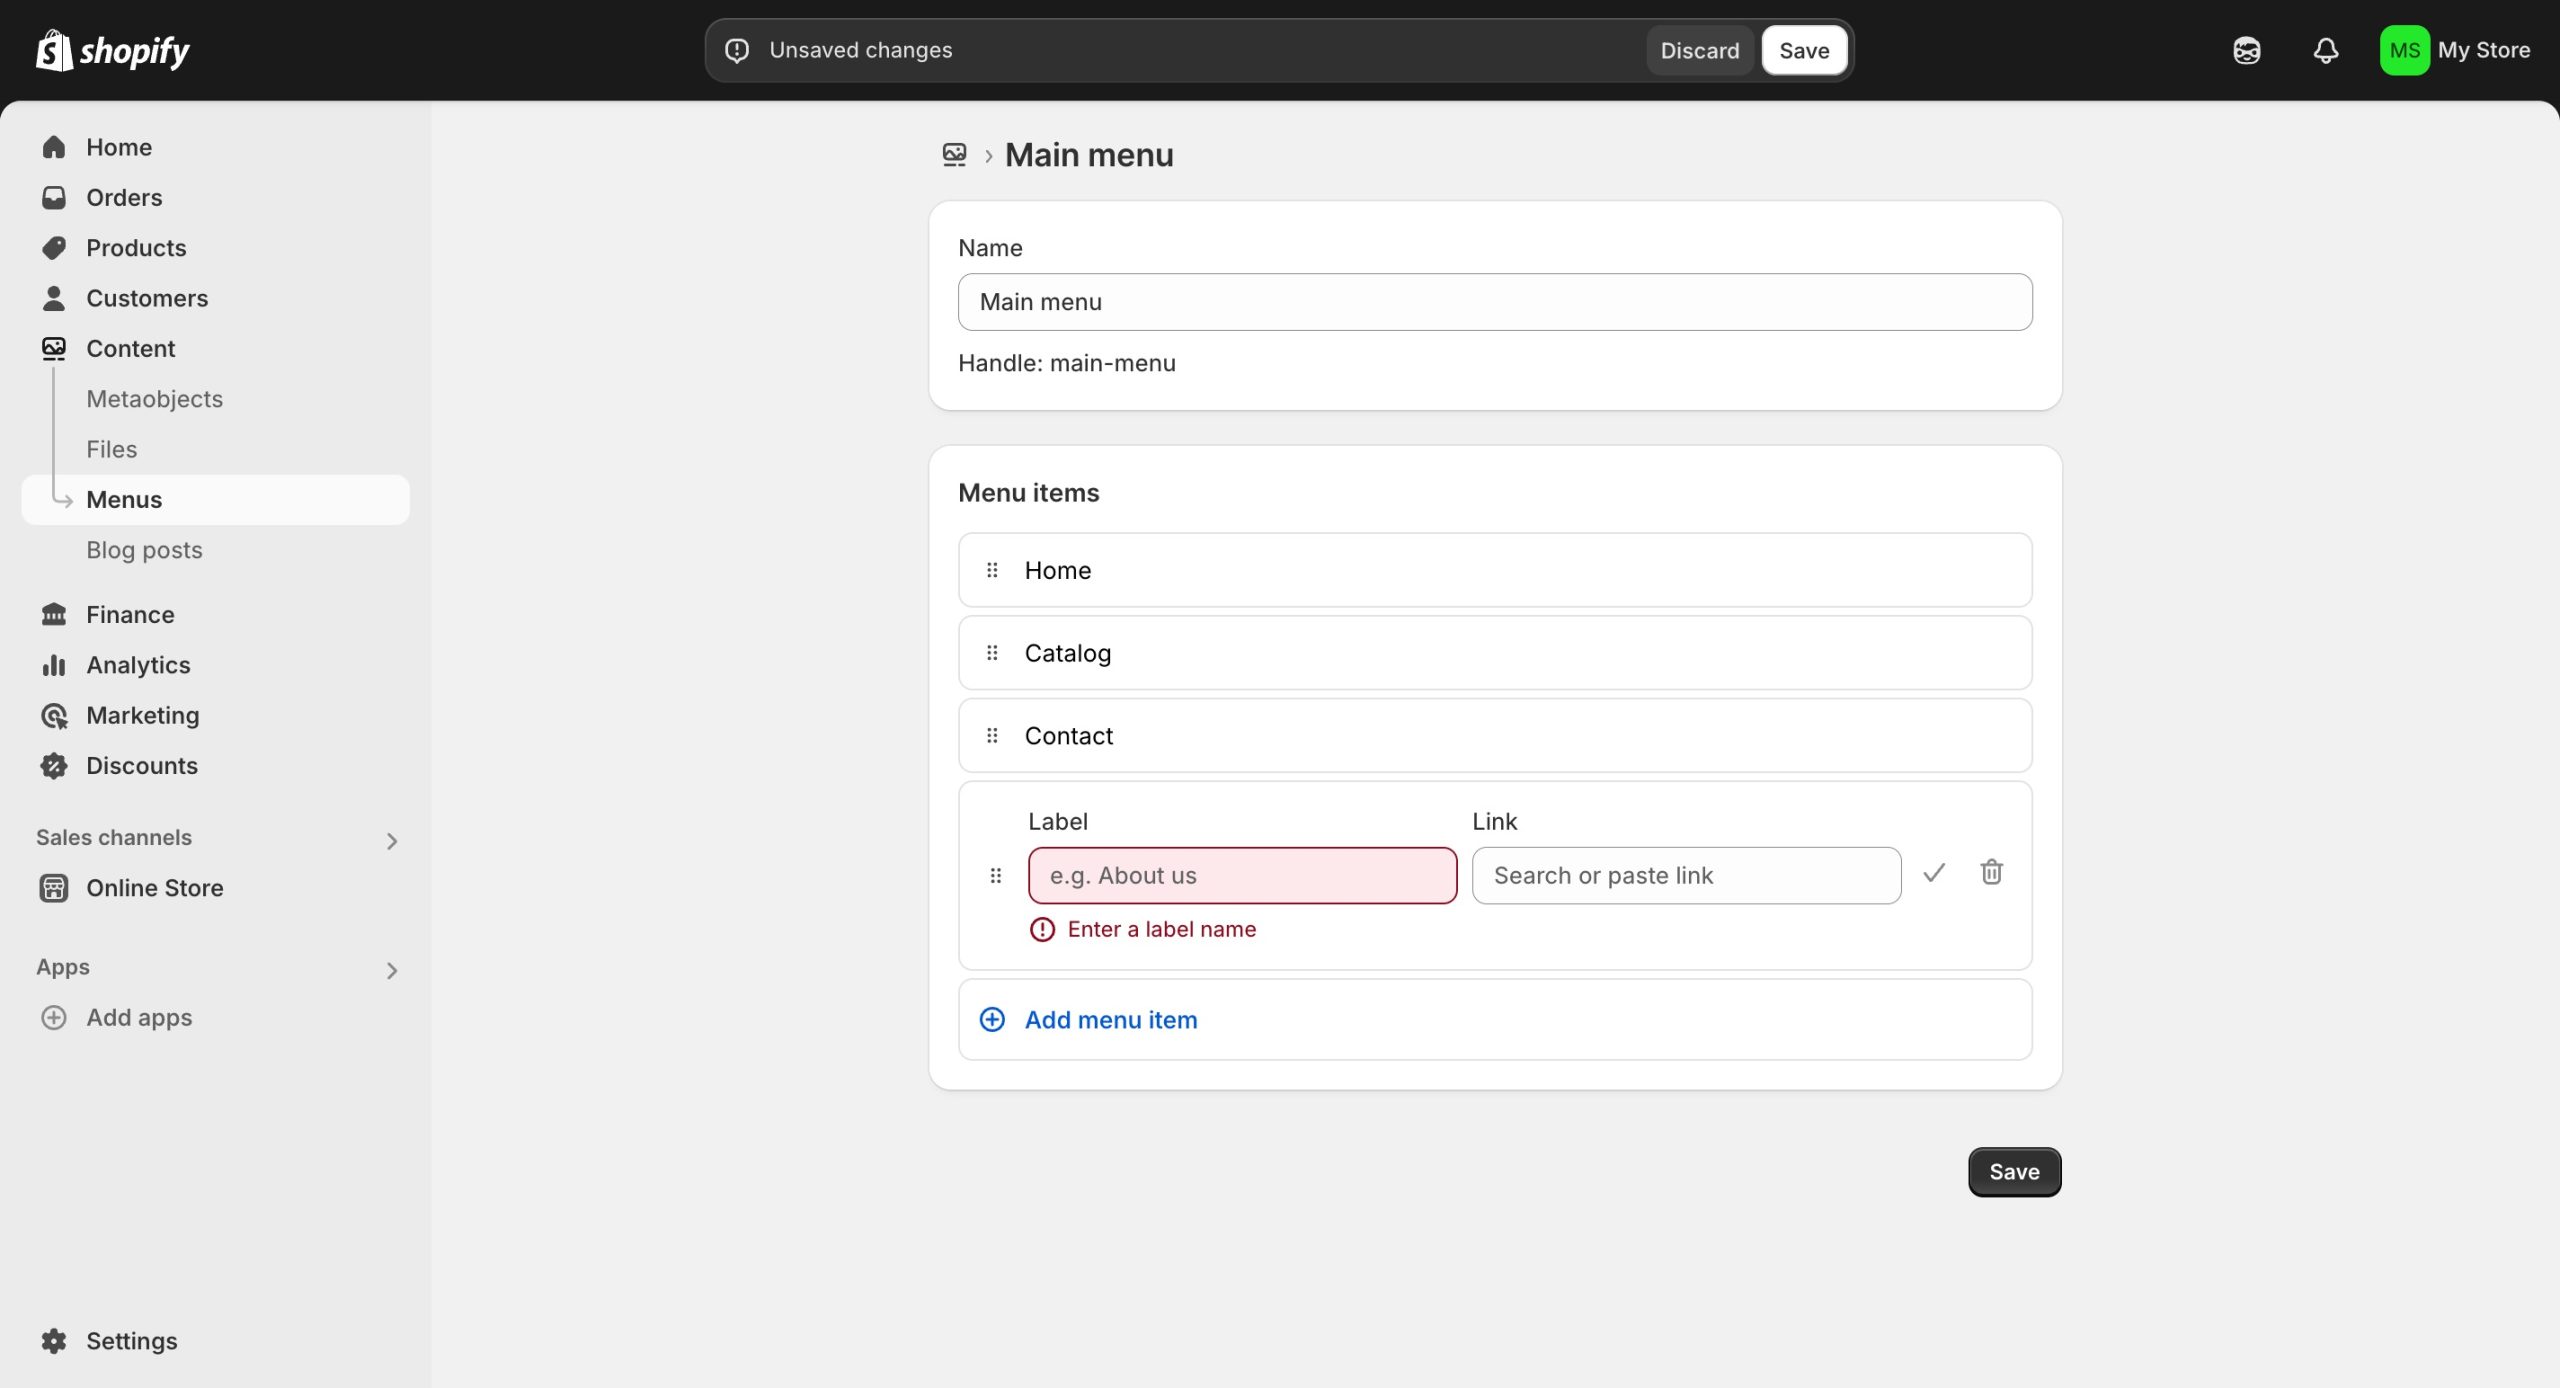
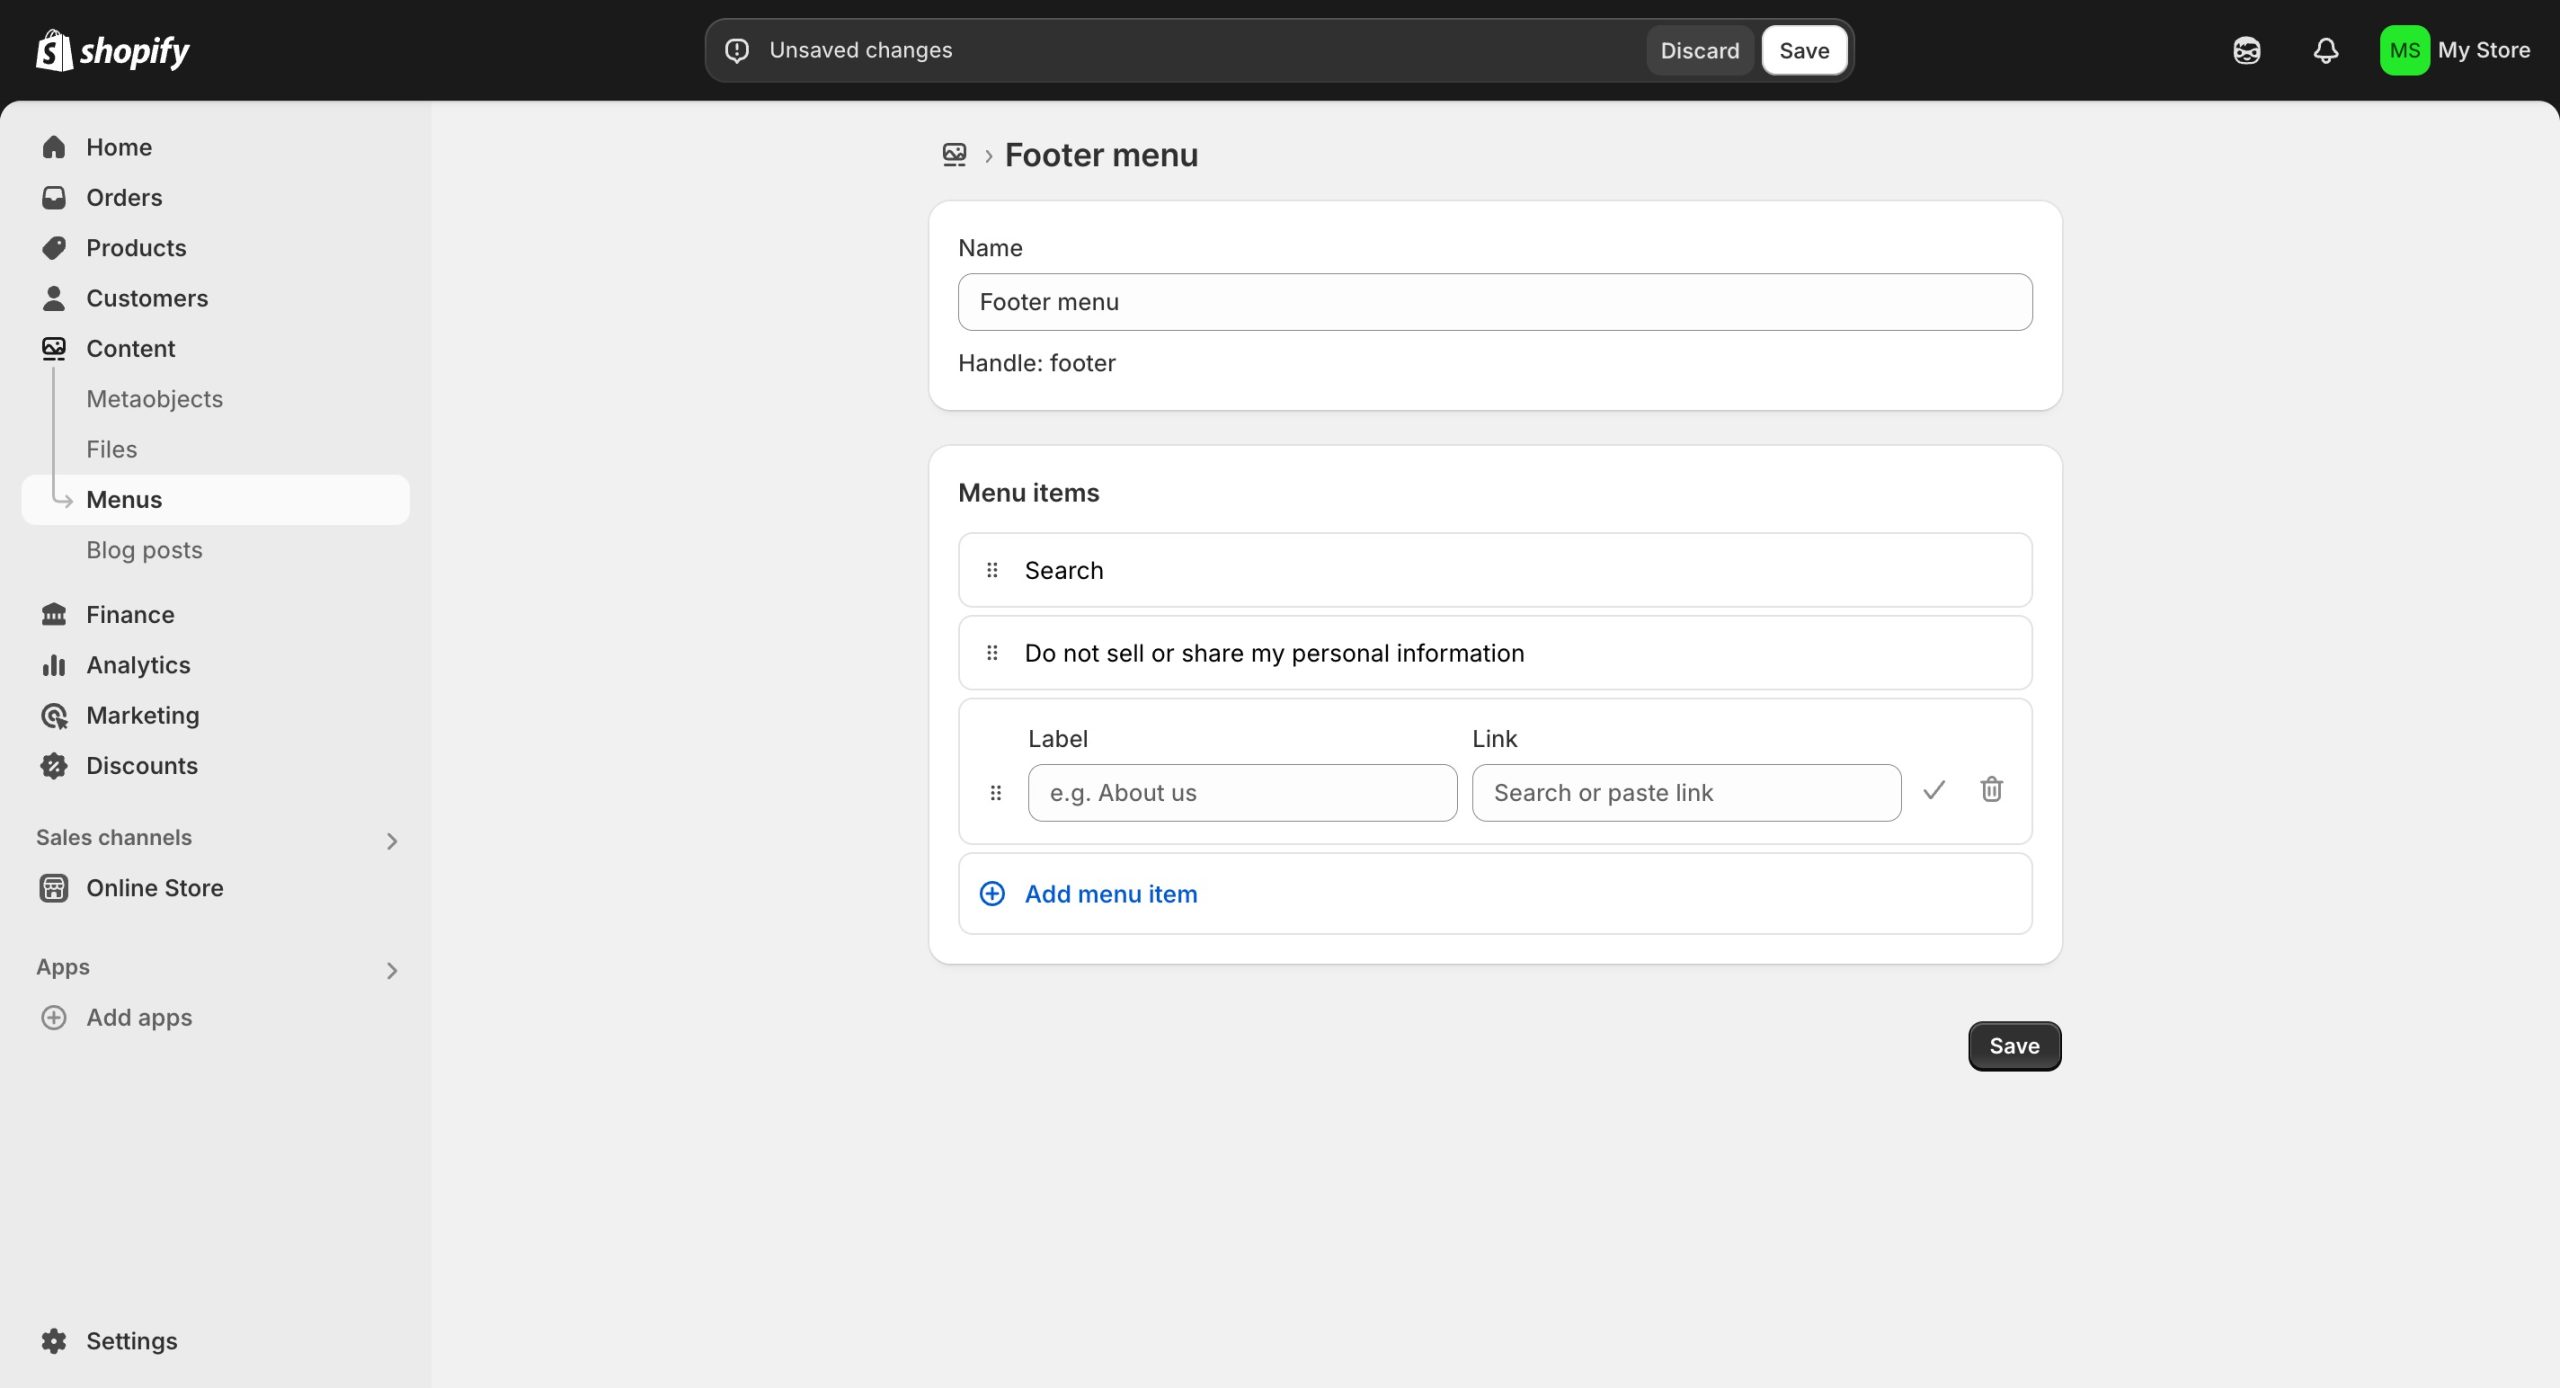
4. Add Navigation and Customize Footer
When all the theme setup is done, it’s time to add navigation to your theme. Click on the online store, then go to the navigation section of your admin panel. Customize the footer by clicking on the Footer menu, then click on Add menu items. Now this will open a side bar, you can add name of your items and paste a link.
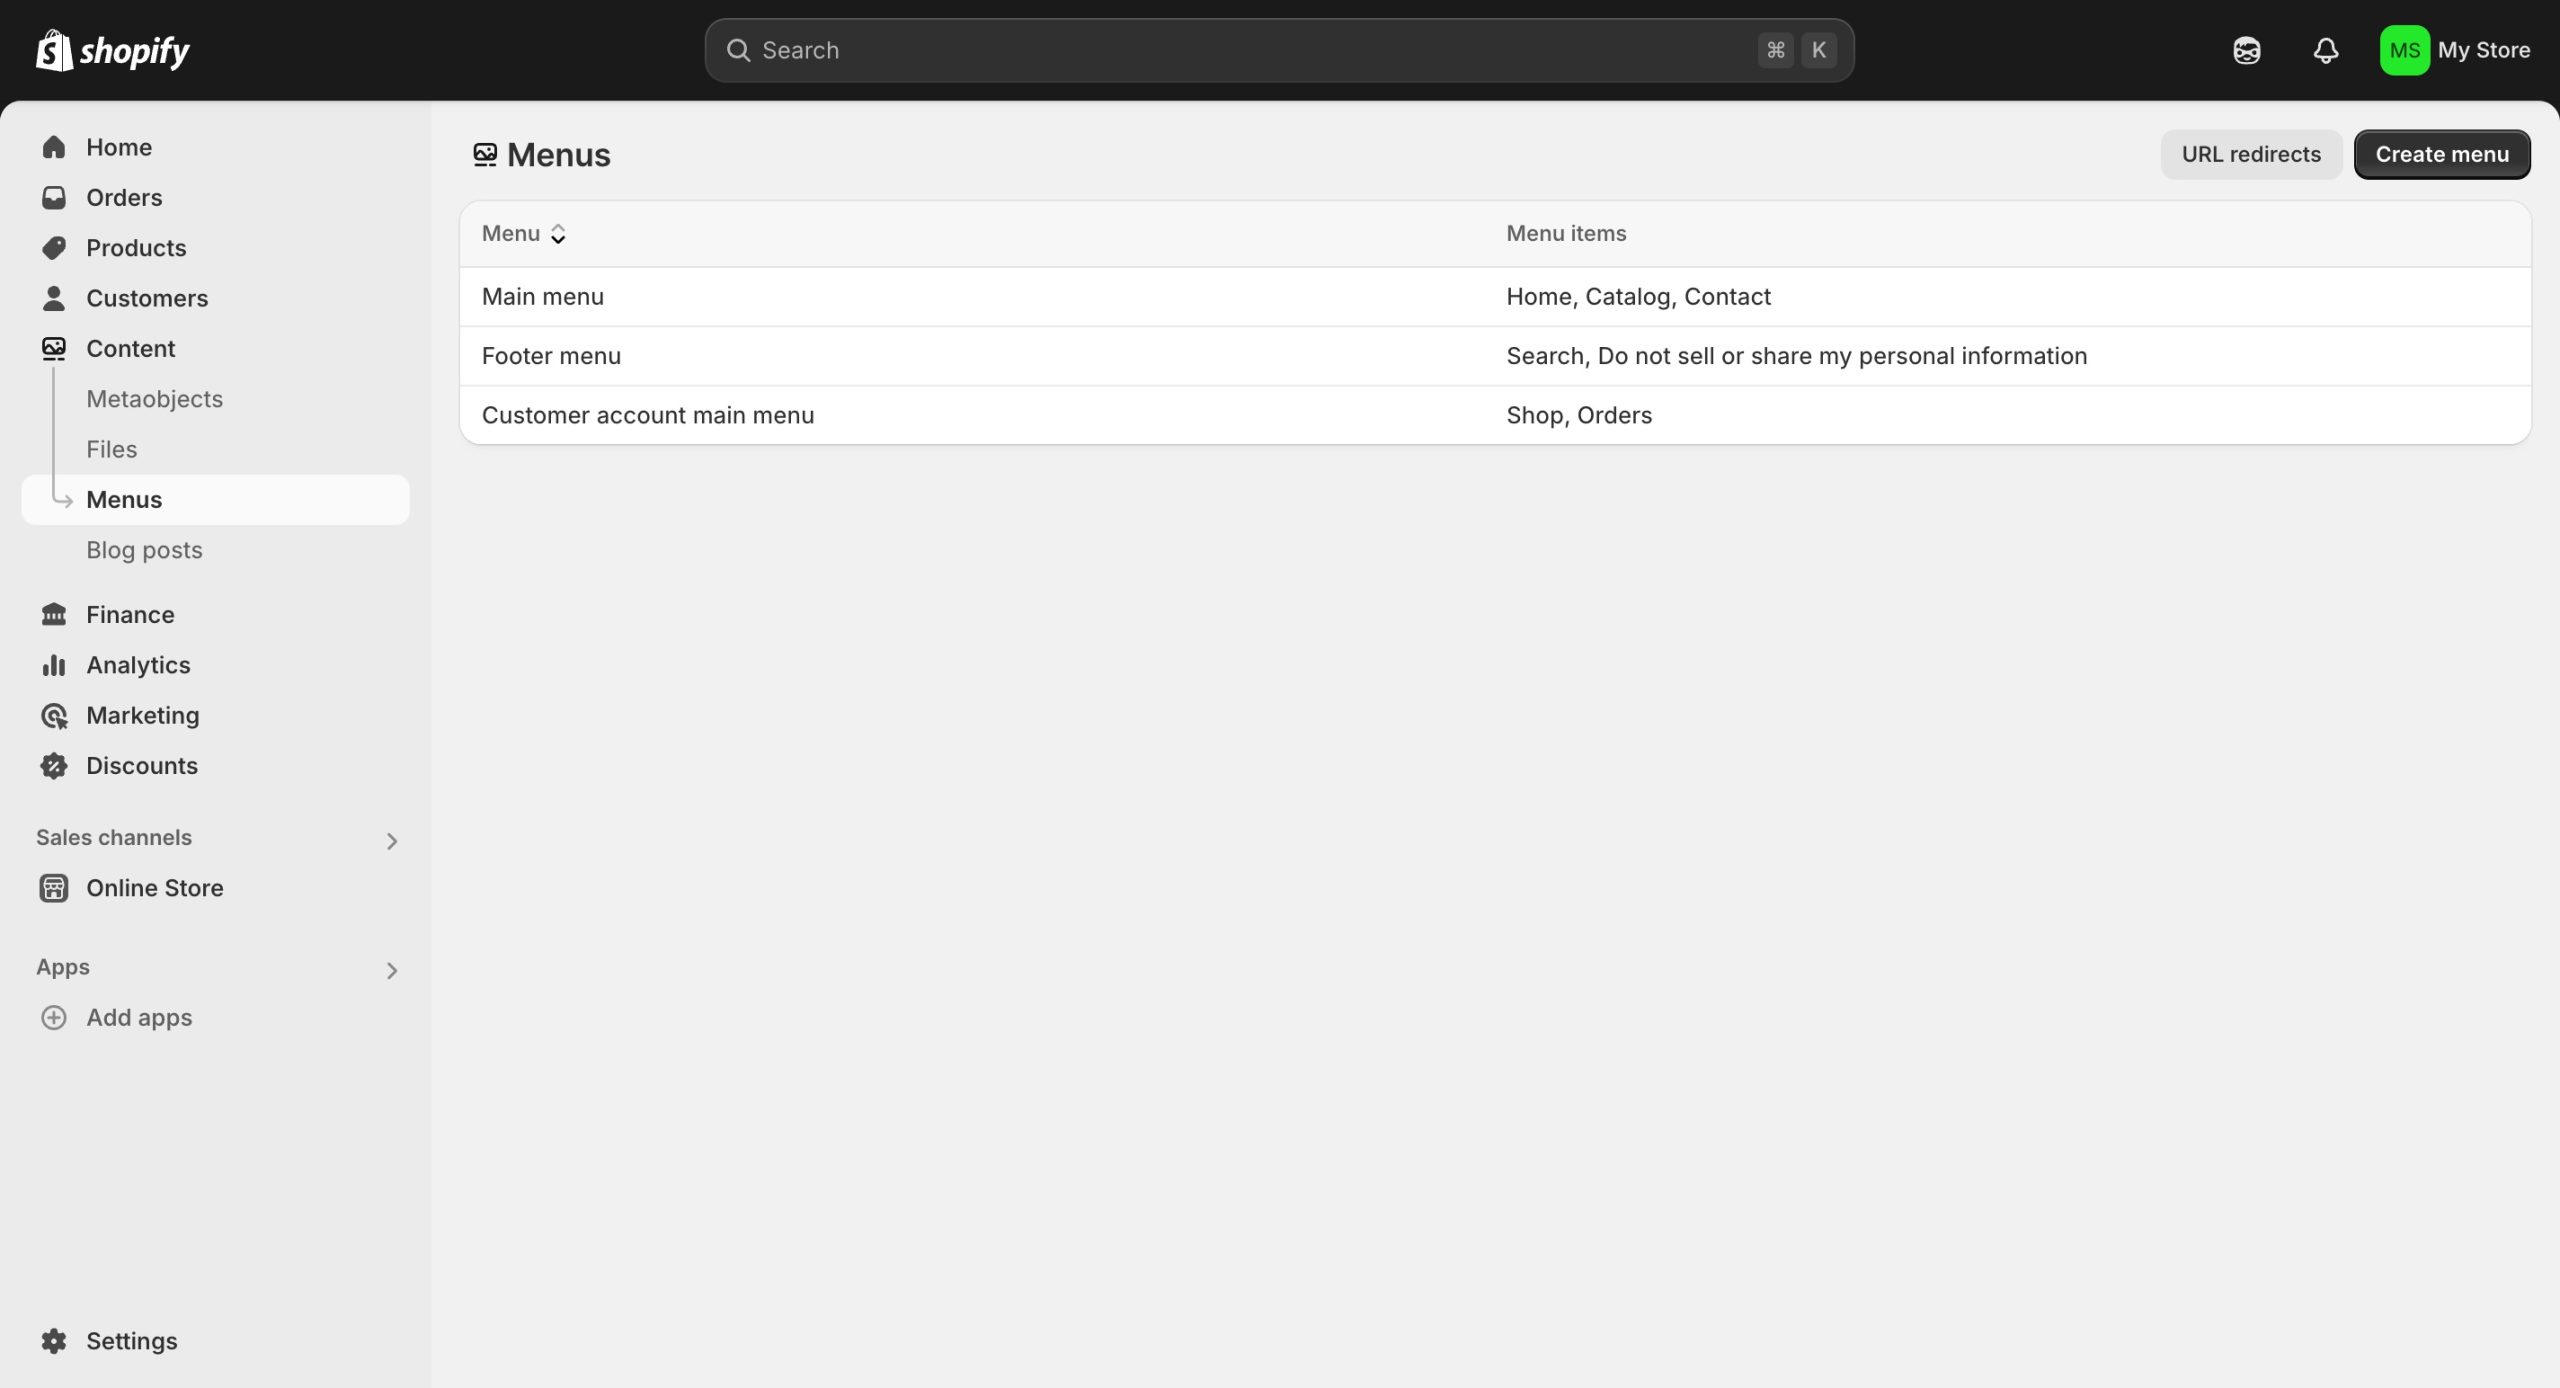
With so much customization available, Shopify also allows you to create nested menus. You can easily group your products and pages, and create dropdown menus.
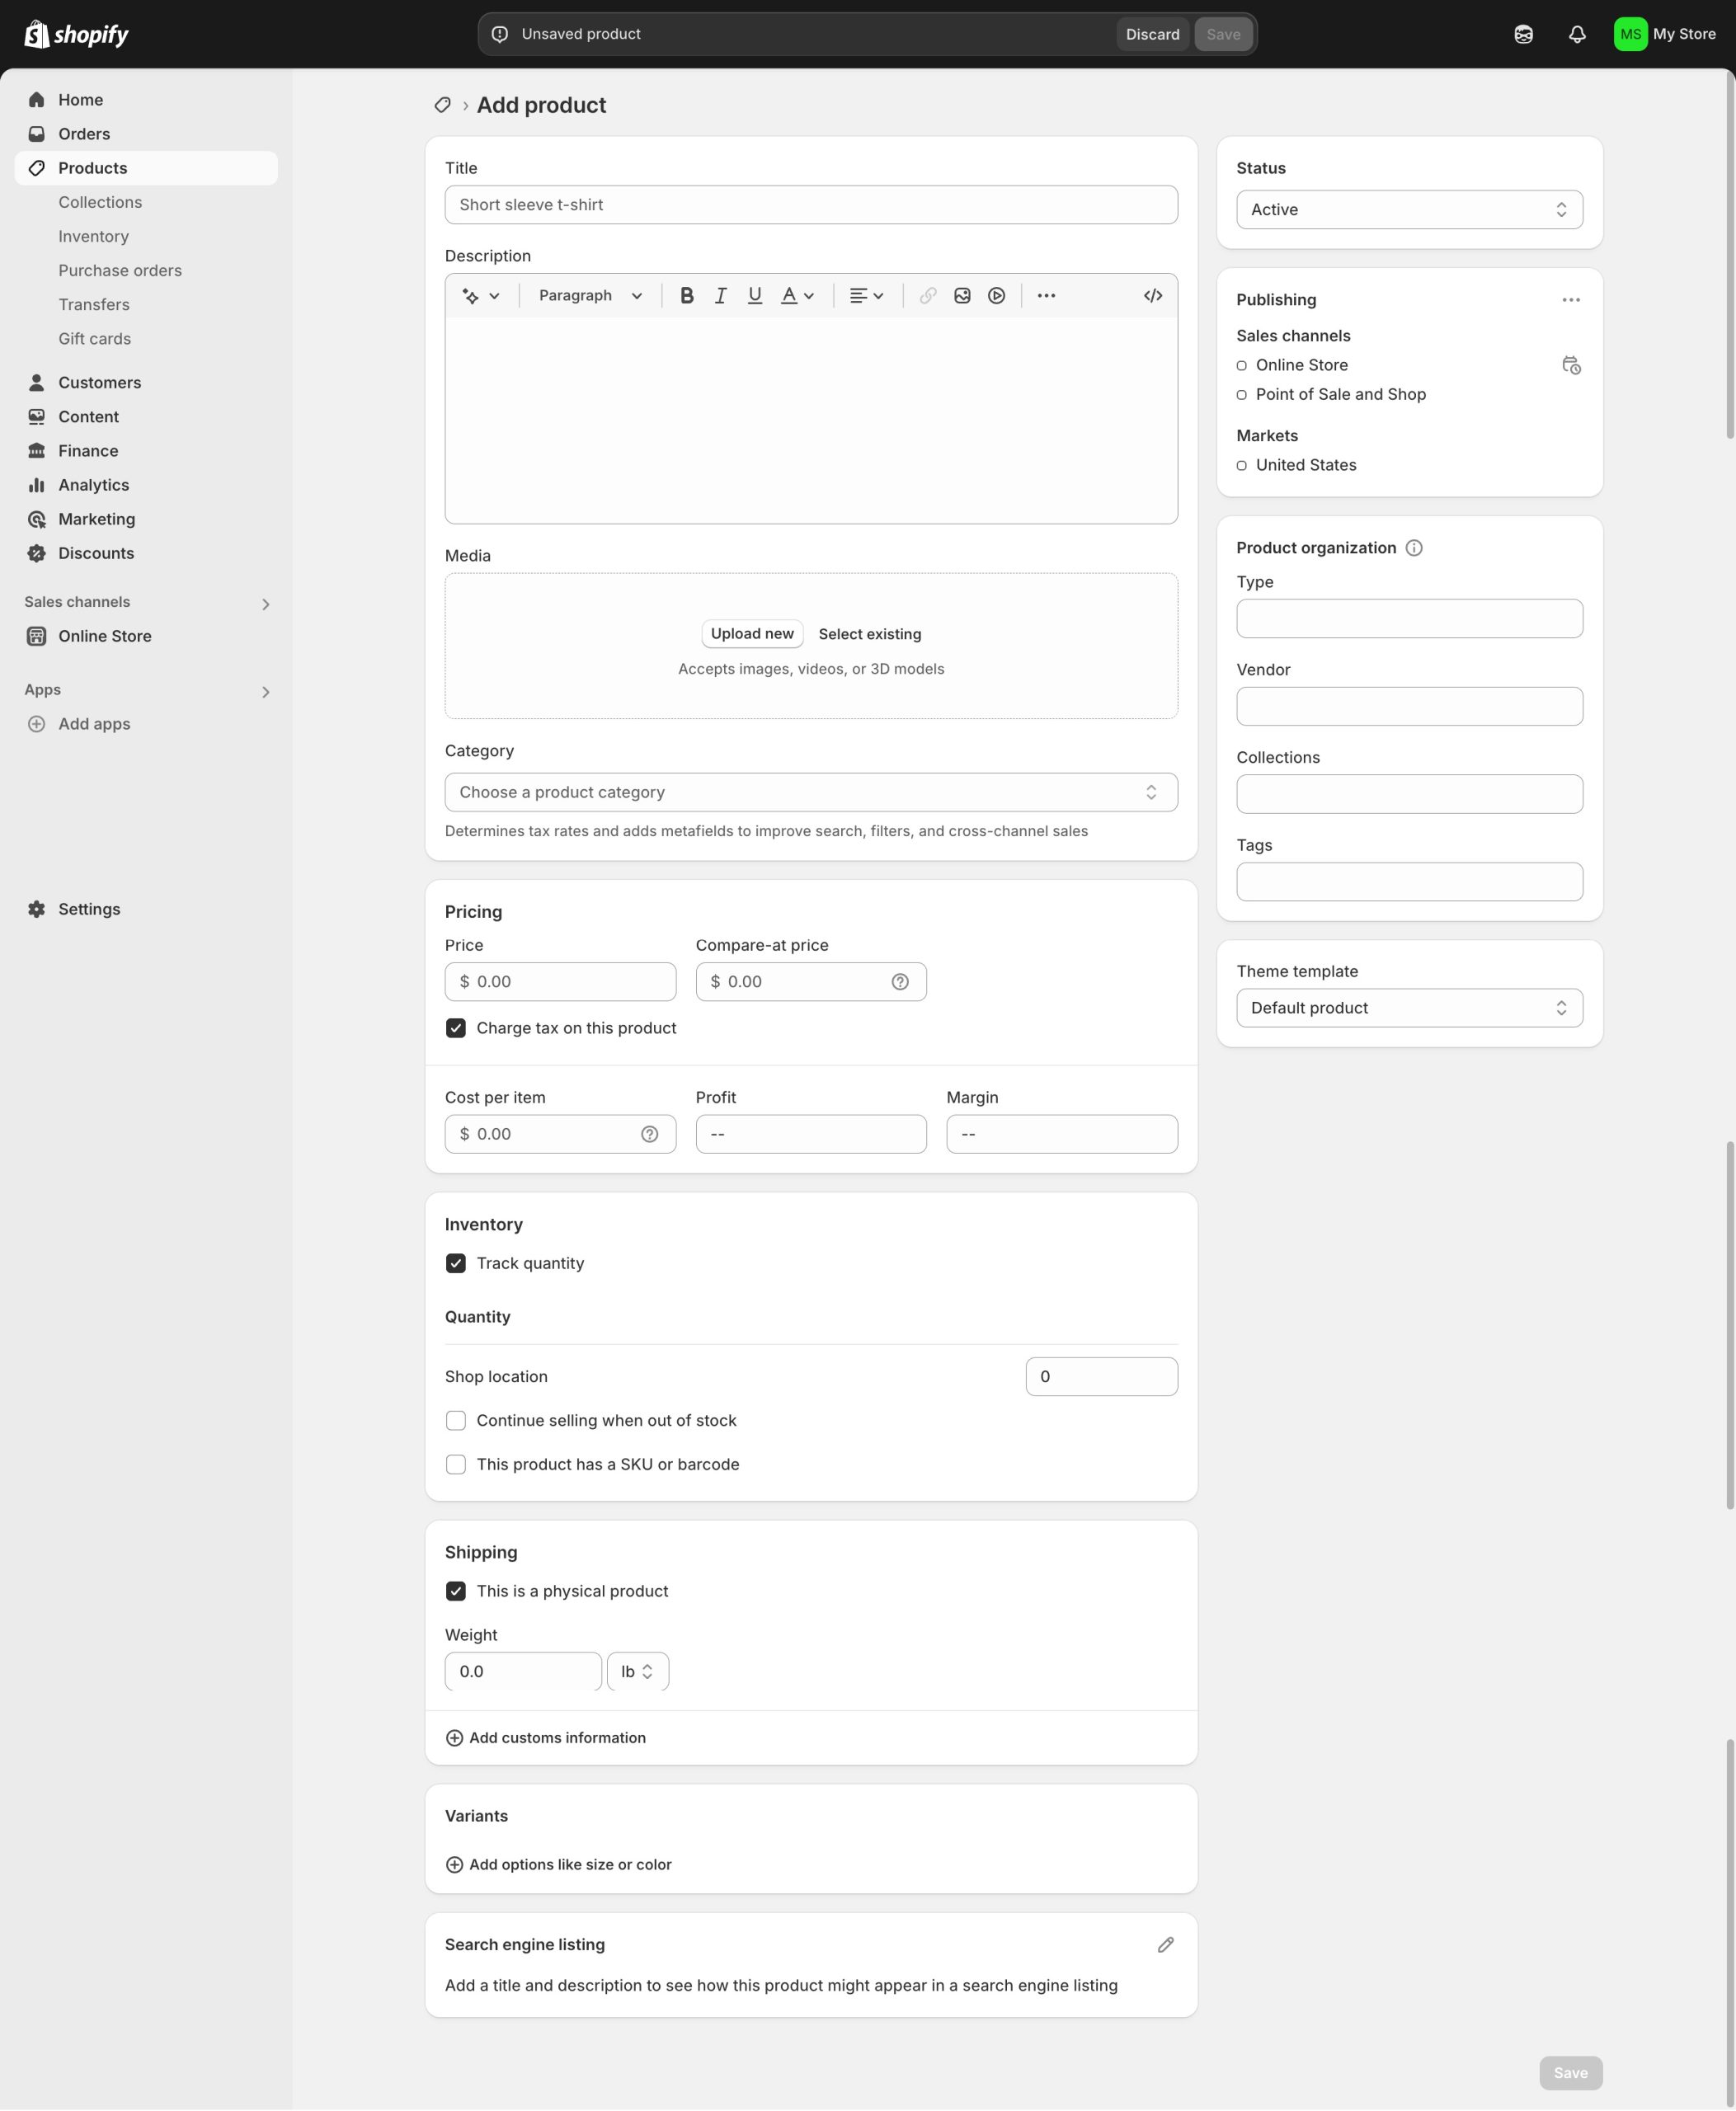
5. Time to Add Products and Descriptions
Organize and add the products and descriptions to your store.
To ADD NEW products-
- Go to Products
- Add Product
- Add Product Title, Description and Other Related Content
- Save
Now to EDIT the existing product-
- Click on Products
- Click on the Product you want to make edits to
- Make edits to the product
- Save
To DUPLICATE the products-
- Go to Products
- Click on the name of the product you want to duplicate
- Click Duplicate
- Add the name of the duplicate product and click Duplicate Product
- Make the necessary changes
To DELETE a product –
- Go to your Shopify Admin and Click on Product
- Select the product you want to delete
- Click Delete on the product detail page
To ARCHIVE a product-
- Go to Products
- Click on the product you want to archive from Your Store
- Click Archive Product on the product detail page
INCLUDE and EXCLUDE your products from the sales channels
- Go to the Products
- Click on the product name to open the product details
- Click on the Manage, and Manage Sale Channels
- Select the Sales Channels and apps to include the product
- Click Done and Save
Add and remove TAGS –
- Go to Products
- Click on the name of the product to edit
- There is an Organization Section, you can add and remove tags, just make sure you separate them with commas
- Save.
Edit SEARCH ENGINE LISTING PREVIEW
- Go to the Products
- Click on the product you want to edit
- Click Edit Website SEO
- Add title and description according to search engine listing
- Save
6. Create Pages for Your Shopify Store
Creating different pages on your store will give buyers a better user experience. This way you will be able to differentiate between products and their range. It will be simple; for example, a user wants a well-gripped trekking shoe, he/she is scrolling the shoe category page and is not able to find the trekking shoes, eventually having a frustrating experience… right?
Now, imagine you have created a separate category page of trekking shoes; the user came, got the shoes and voila, happy. This happened because the navigation was easy, the journey became much easier for users to navigate the category and find the product they were looking for and it enhanced their overall experience.
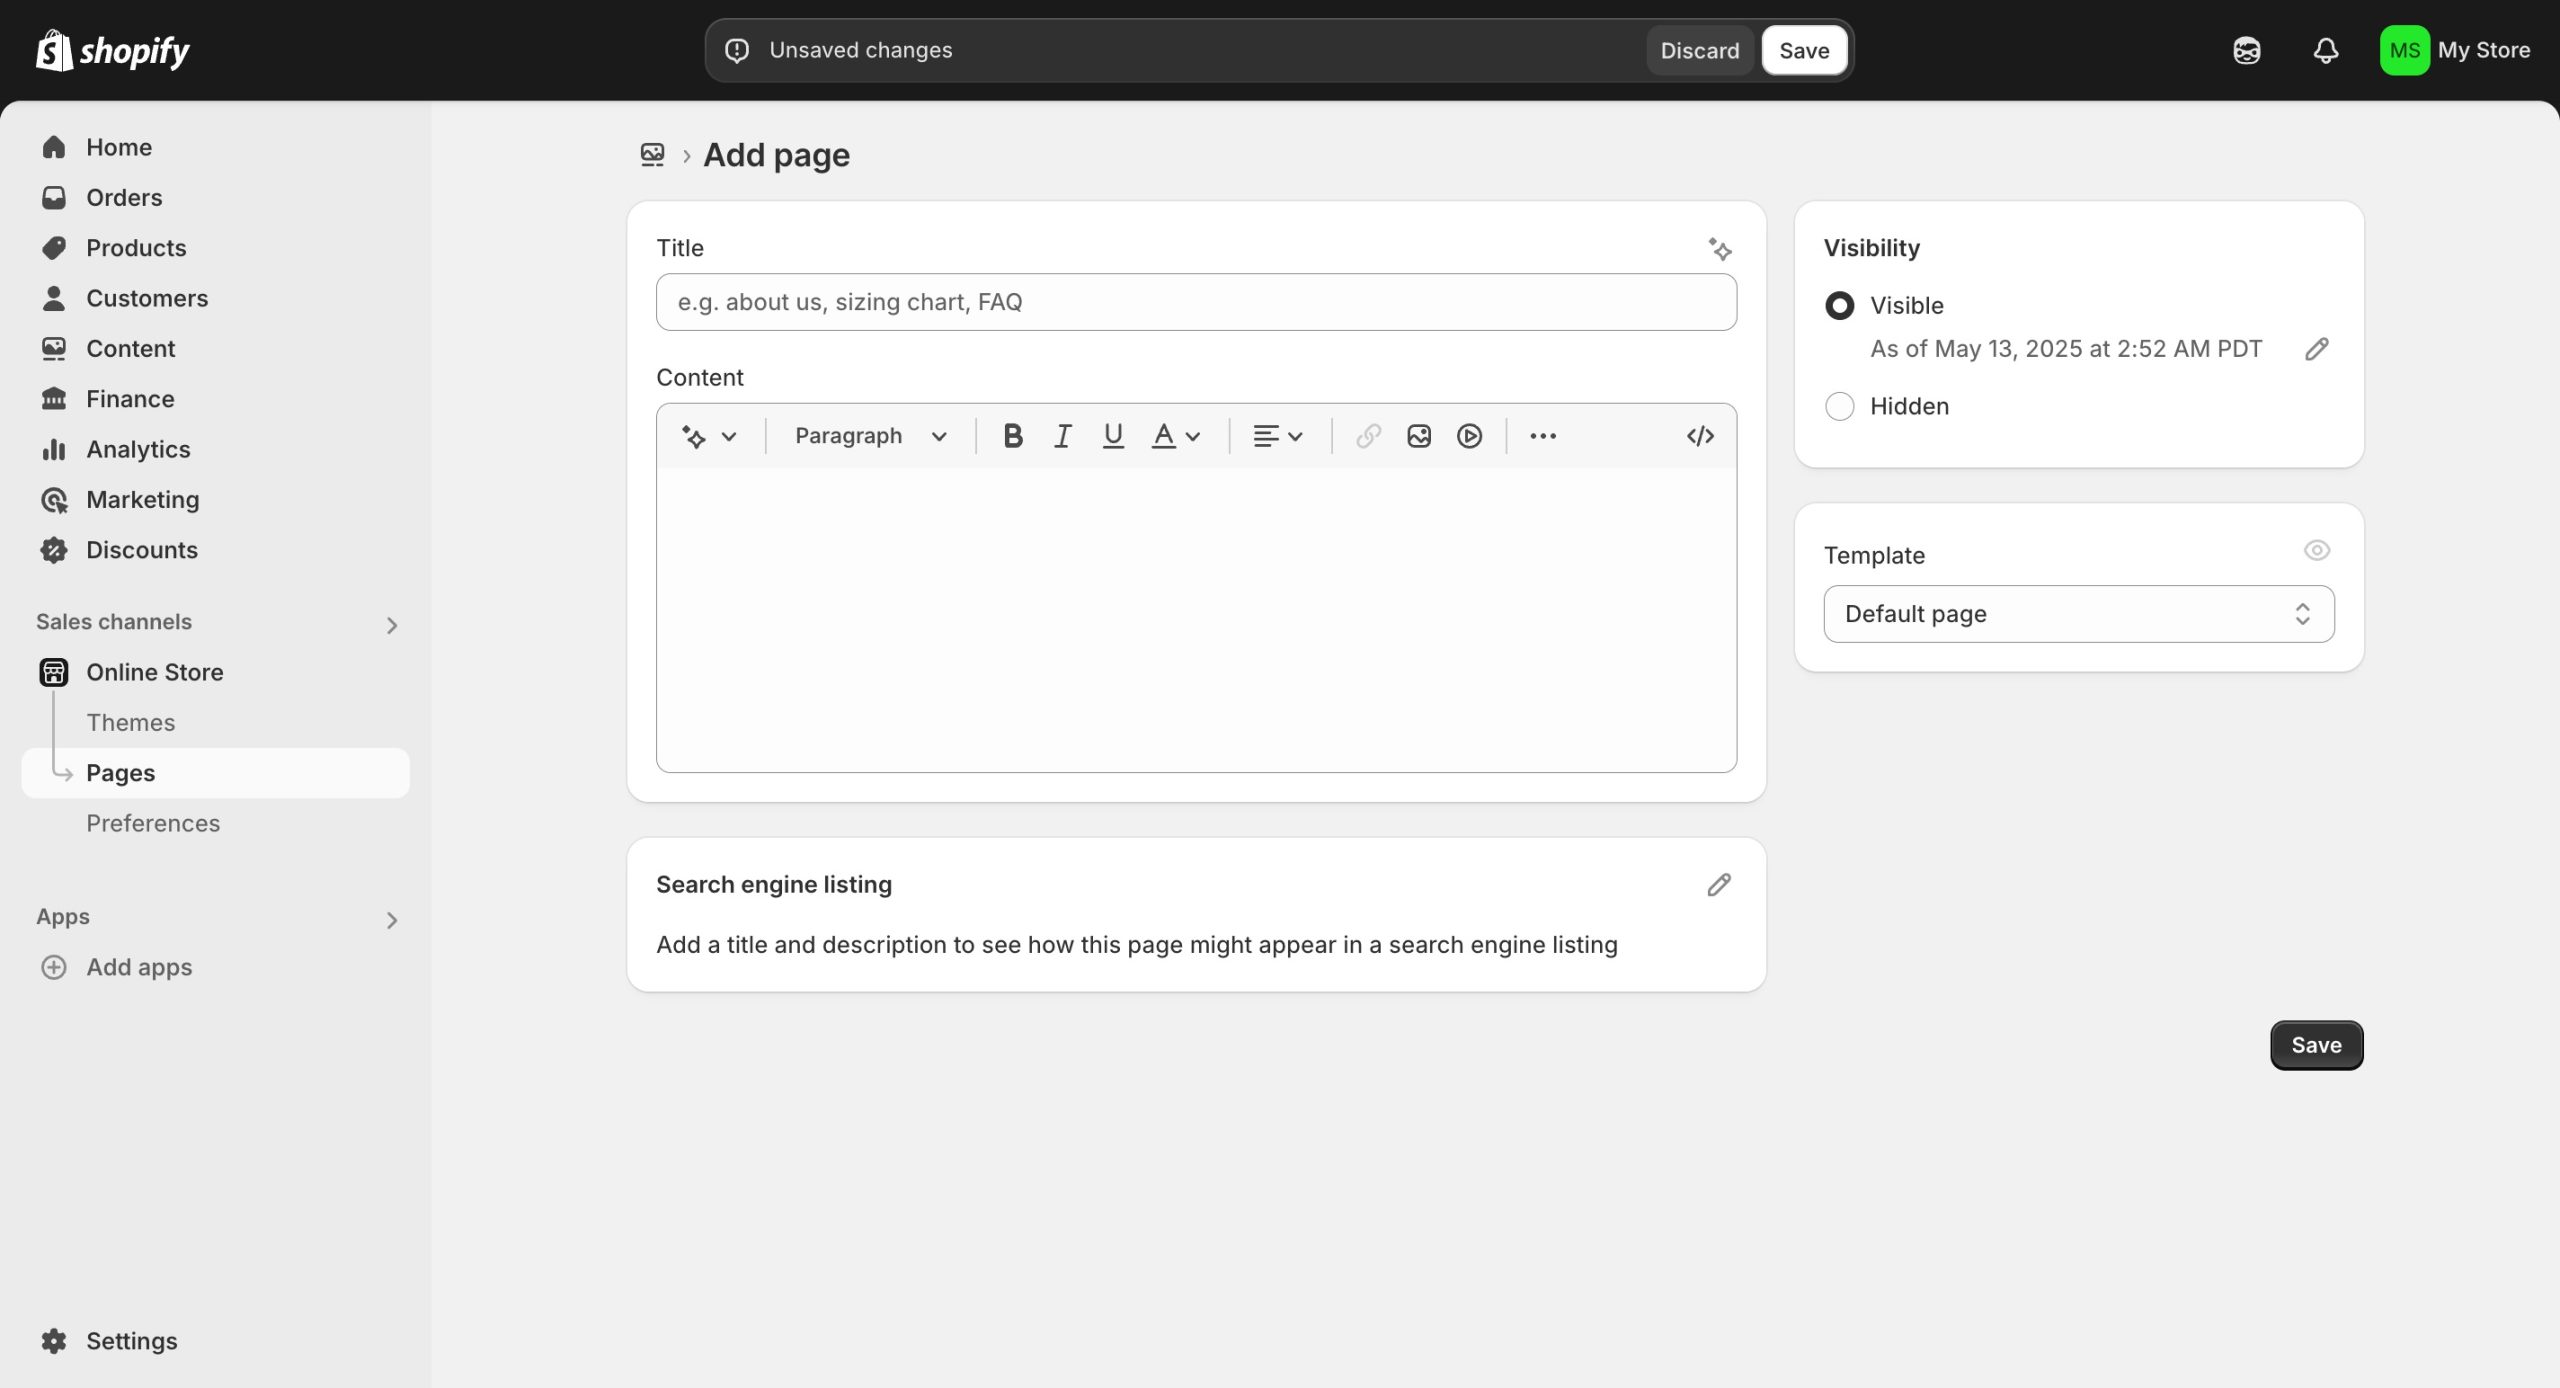
In order to Add Pages to your Shopify store
- Go to Online Store
- Click on Pages
- Click on the Add Page button,
- Enter a title, content and all the details of the new page. You need to be very clear with your content, it should be descriptive, and you should make your title clear and concise. It will appear in browser tabs and search engine results.
But that’s not it, there are a few things that you need to do!
Ø Save the Page: To create the new webpage, click on the SAVE button.
Ø Add Link to the Navigation Menu: Once you have created the new page, make it accessible to the users by adding the link to the navigation menu. Go to the store’s navigation menu settings and make the changes.
Ø Edit the Web Page: To make the edit to the existing web pages, just go to page section, click on the title of the page you want to make edits to, make the changes and save.
Ø Set Visibility: You can choose the page published date in the visibility section. When you save a new webpage, by default it is visible on. And if you do not want any page in the future, you can also hide it.
7. Set Up Payments
Once everything has been set up, now it’s time to set up payment things and checkout. Here are the steps to follow in order to set up payments and checkout.
Ø Check Eligibility: To setup payment on Shopify Payments you need to check the your store’s eligibility as it depends on your location. Shopify has a list of supported countries and areas.
Ø Set Up Two Step Authentication: To protect your financial information, you need to activate the two-step authentication for your Shopify account. This is the most important security measure.
Ø Activate the Shopify Payments: Go to Settings and click on Payments, then click the Activate Shopify Payments box and confirm your choice in the Dialog to remove any other credit card payment providers from the store.
Ø Store Currency: When you add pricing to your products, you need to add the currency as well. Choose the currency you want to add to price your products.
Ø Add business and banking details: Whatever bank details and business details you add make sure everything is correct.
Ø Add VAT Number If You Are a European Store: If you have a store in Europe, then you need to add a VAT (Value Added Tax) number, or just mention that you do not have a VAT number. Shopify verifies the VAT number.
Ø Account Setup: Provide business details like business number, EIN, Taxpayer Identification Number, personal details and more depending on your business type and location.
Ø Add Verification Document and Get the Verification Done: Upload all the valid documents for identity and home address verification. Everything should be clear and updated. Now the documents you have uploaded will go under verification, they will be reviewed and matched with the Shopify Payments information. During the verification, your Shopify store will remain operational, they will just hold the payouts during the process.
Ø Test Transaction and Support: Once everything is done you can perform a test transaction to see if everything is working fine or not. If you need any support during the setup process, connect with the Shopify Support for further assistance.

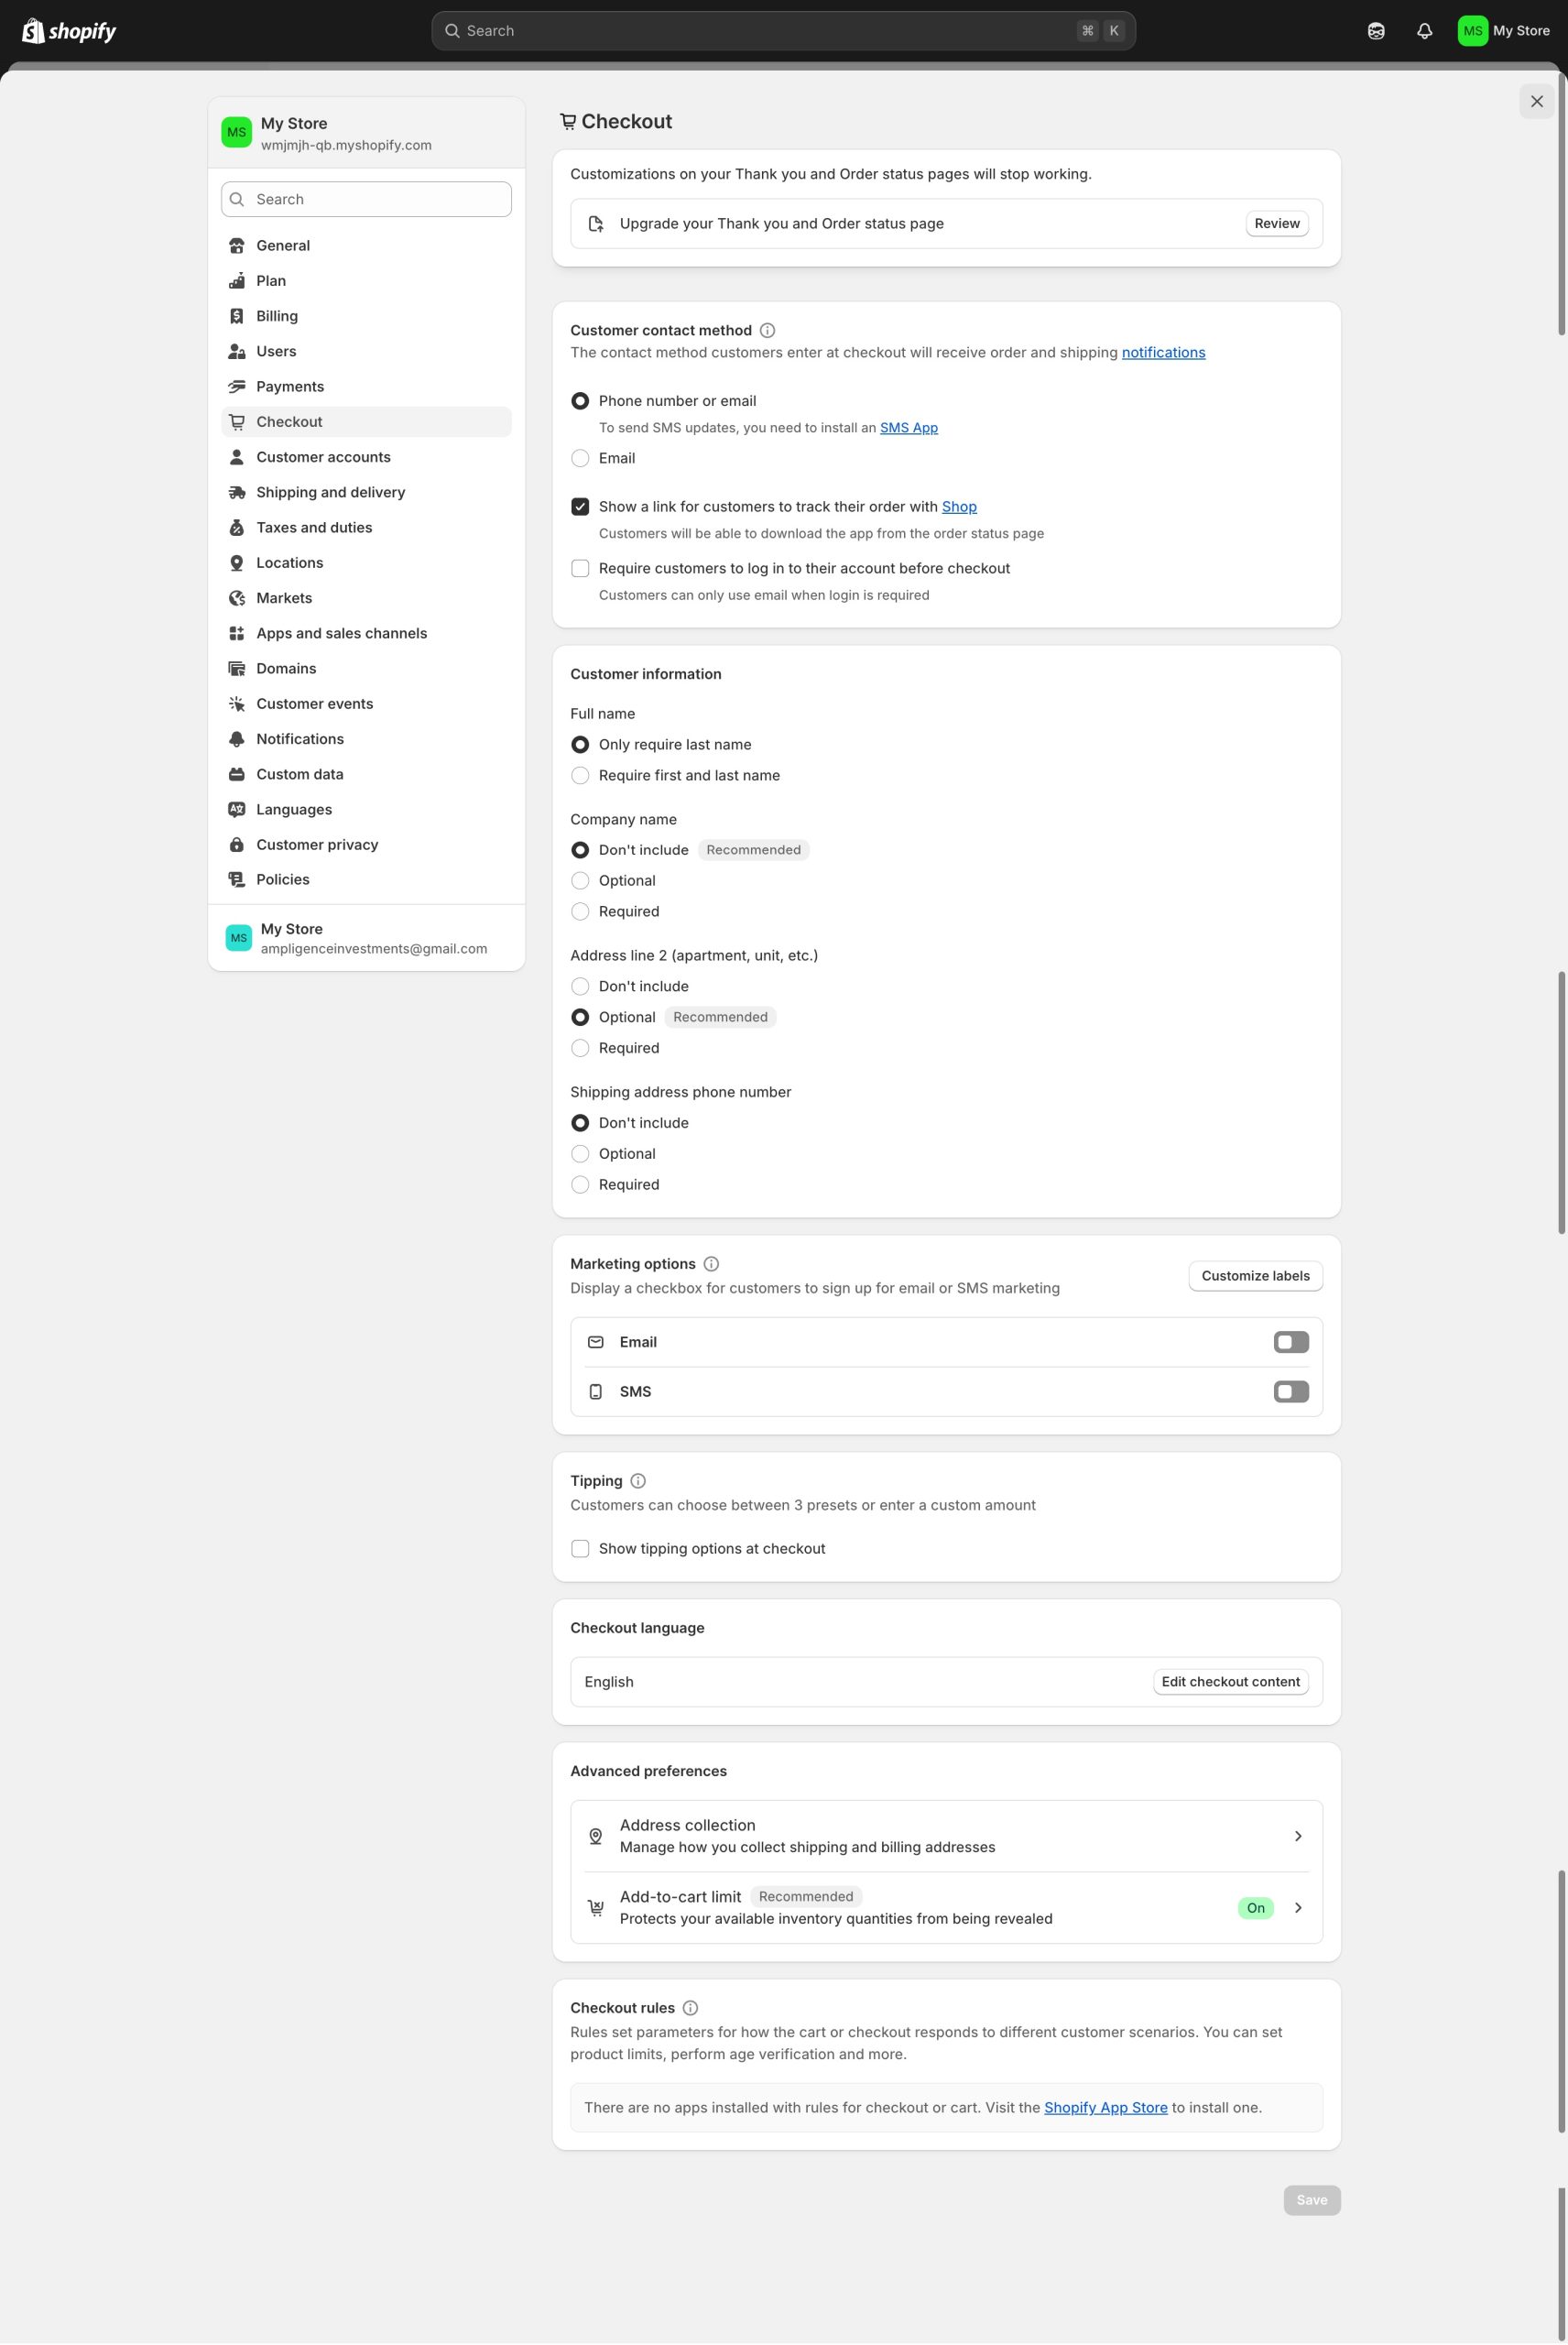
8. Setup Checkout Page
Ø Add a Checkout Button: Go to Settings and click on Checkout from the dropdown of setting page.
Ø Customize Checkout Settings: You can customize the various features of checkout process including checkout language and style, customer accounts and preferences, shipping and delivery options and taxes and currency settings.
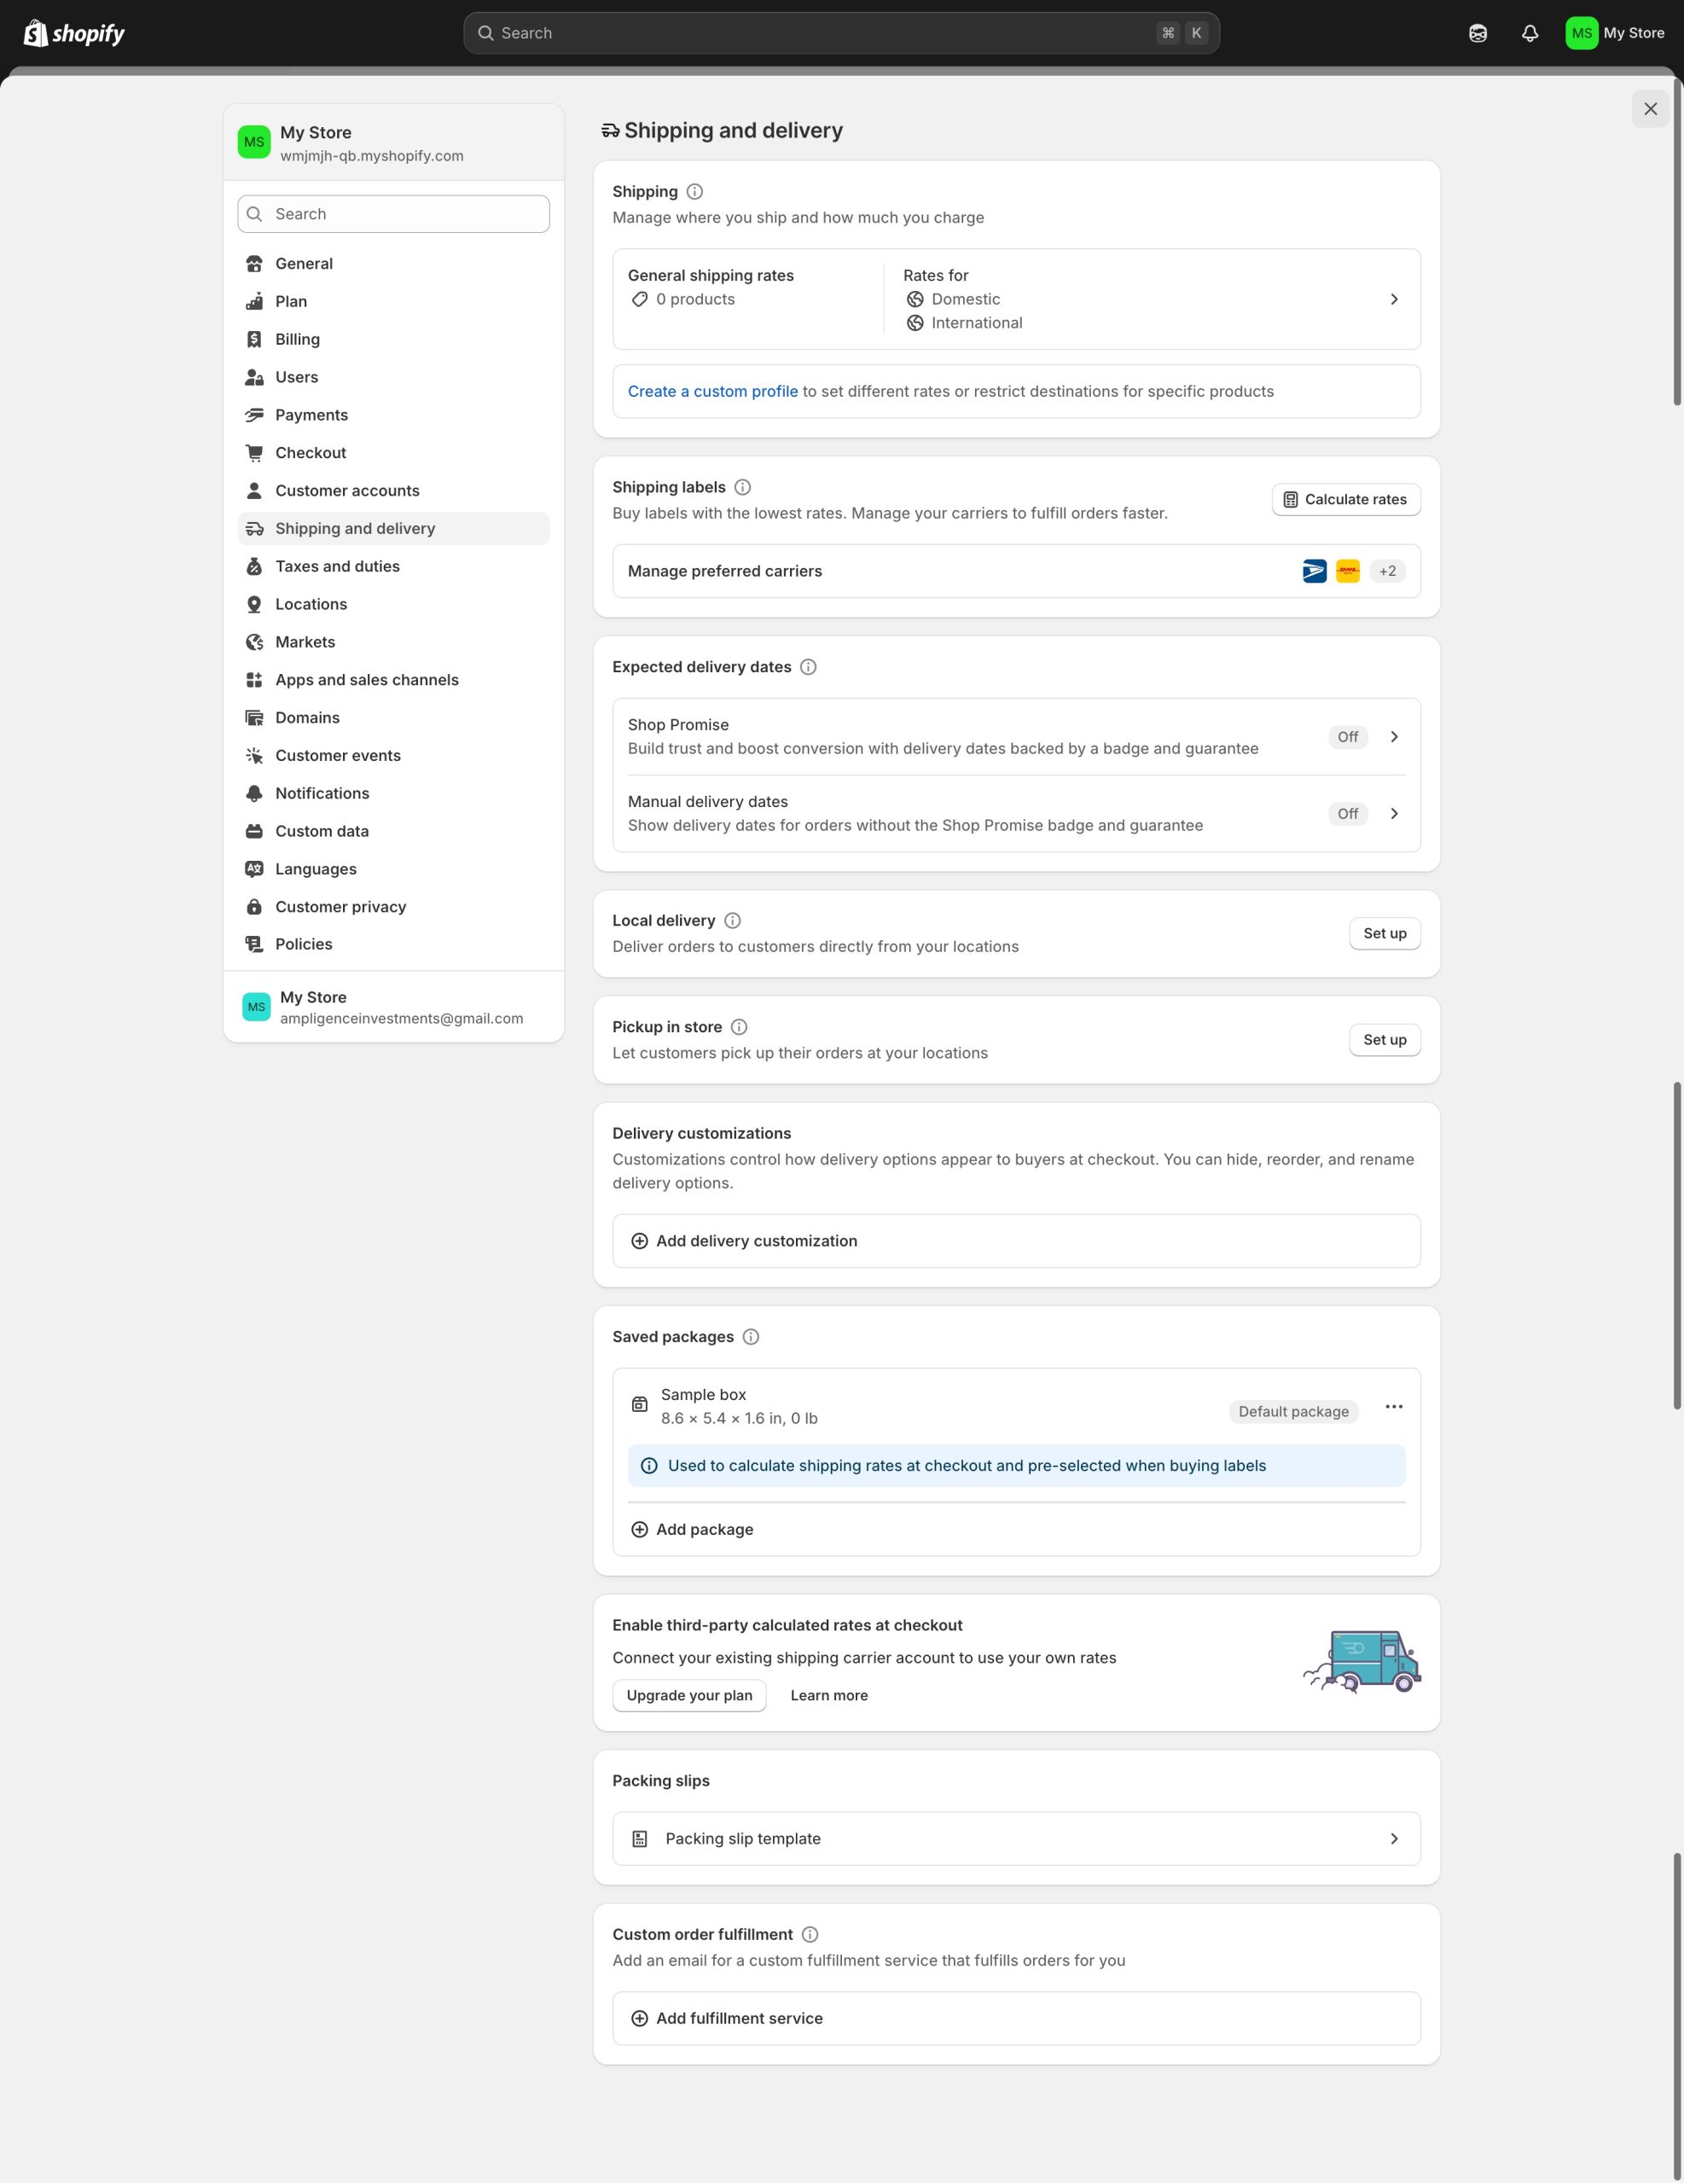
9. Decide and Set Up Shipping Rates
Setting up Shipping rates on Shopify is easy. All you need to do is go to Settings >> click on Shipping and Delivery >> Then Select the Shipping Profile You Want to Go for >> And Click Manage.
Once done, add these as well:
Ø Add Shipping Rates by clicking on the Add Rate and set the rate details, also mention the applicable rate value like amount, weight, currency, and more.
Ø You can also Add Conditions if you want on weight, price, and other factors to qualify for shipping rates.
Ø Decide the Calculated Rates, you can easily mark up or show the discounted rates to adjust what customers will see at checkout.
Ø Click Done and Save to add the shipping rates.
Ø Setup the Local Currency Shipping Rates as Shopify Payments allows you to provide flat shipping rates for customers from different markets in local currencies.
You need to monitor and make the adjustment to your shipping rates according to the market. This will help you to ensure that you are providing competitive rates to your customers.
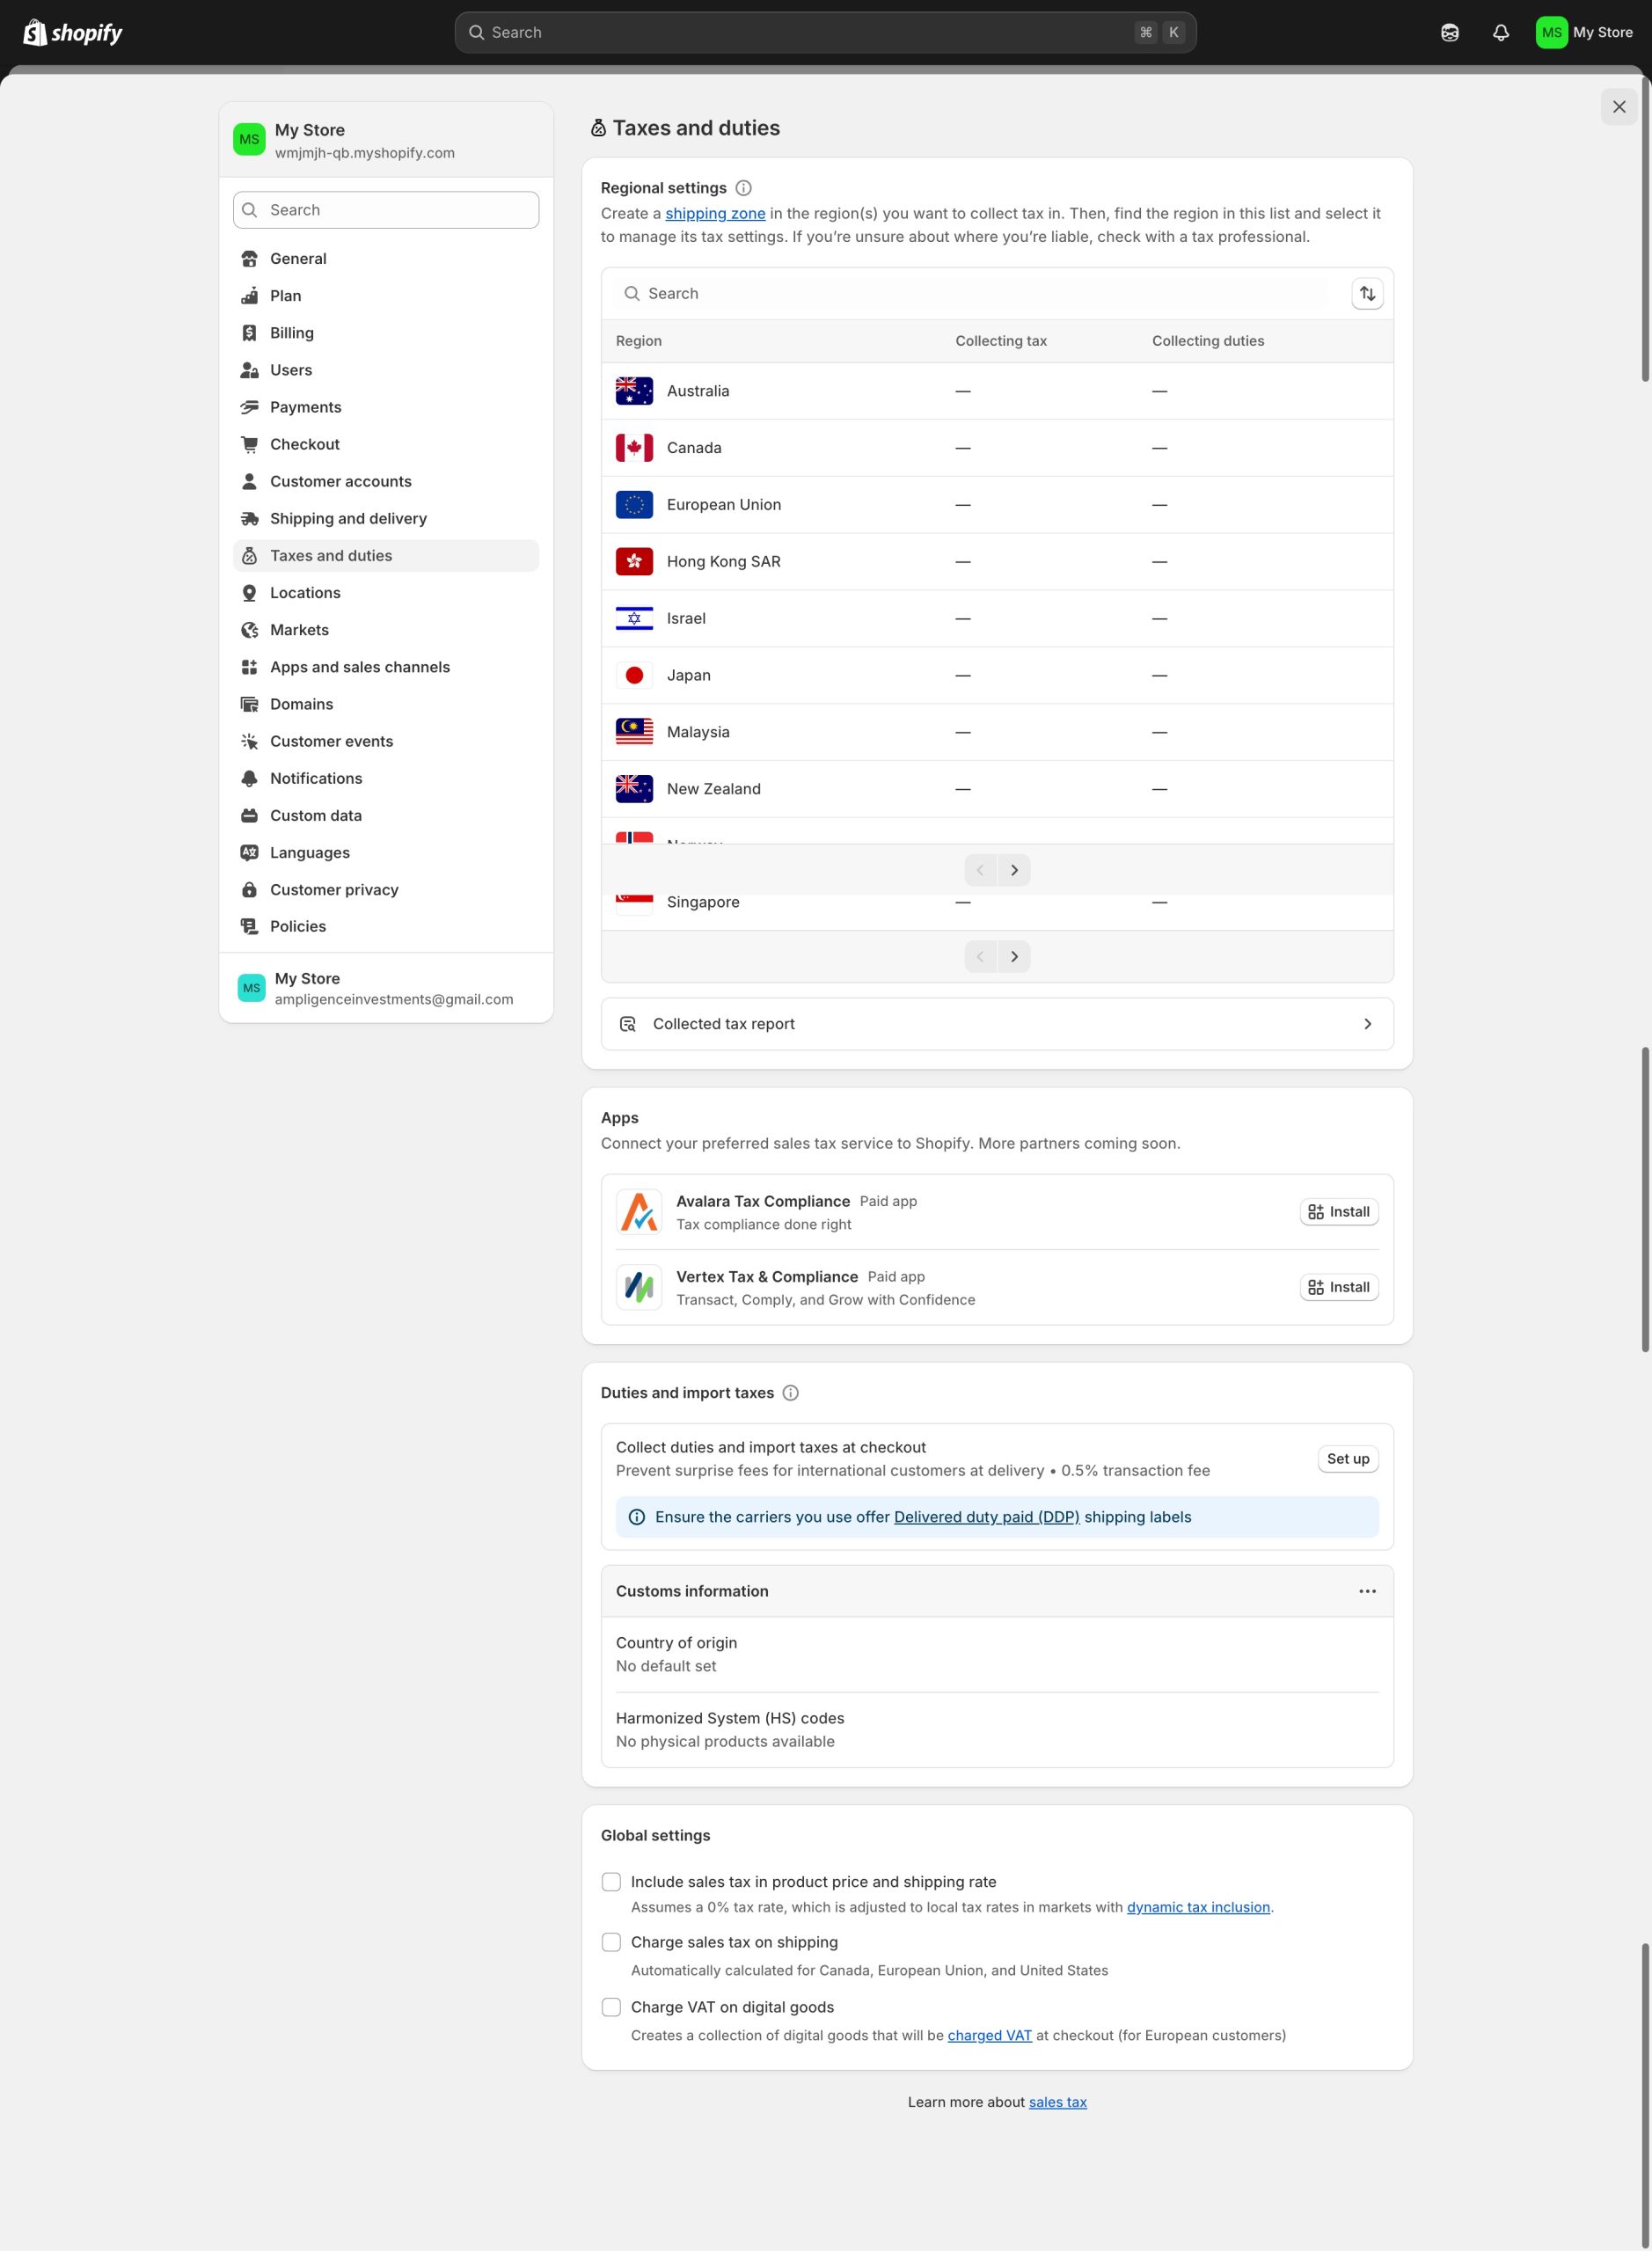
10. Setup Tax Rates
Decide whether you want to charge tax on your product or not. Consult the designated local tax authority to ensure you are following the correct regulations. If you decide to charge taxes, then get your registered tax number. Follow these steps for tax rate setup:
- From Shopify Admin Go to Settings
- Then Taxes and Duties
- Click Manage Sales Tax Collection and Select Country or Region
- Go to Collect Sales Tax
- Add Tax Number in the Tax Number Field (or leave it blank if you do not have)
- Click Collect Tax to Get the Tax from Selected Region.
- If you want to set up tax for other regions, go to Collect Sales Tax and add the regions.
- Manage all the tax settings like tax overrides, exemptions and other tax calculations from the Taxes section only.
11. Connect Domain
- Go to Settings
- Domains
- Buy New Domain or Connect Existing Domain
- Enter Domain Name if you are connecting to an existing domain and click Next
- Click Connect Automatically
- Then Close
It will take up to 48 hours to get your domain verified. After the verification, your store will be listed under third party domain section with the status Connected.

12. Test and Launch
Text everything before you make your store live.
- From admin, Go to Settings
- Payments and Edit
- There is a Check Box, Click on the Use Test Mode Option
- Save
Try a transaction so you can be sure that your store is working fine.
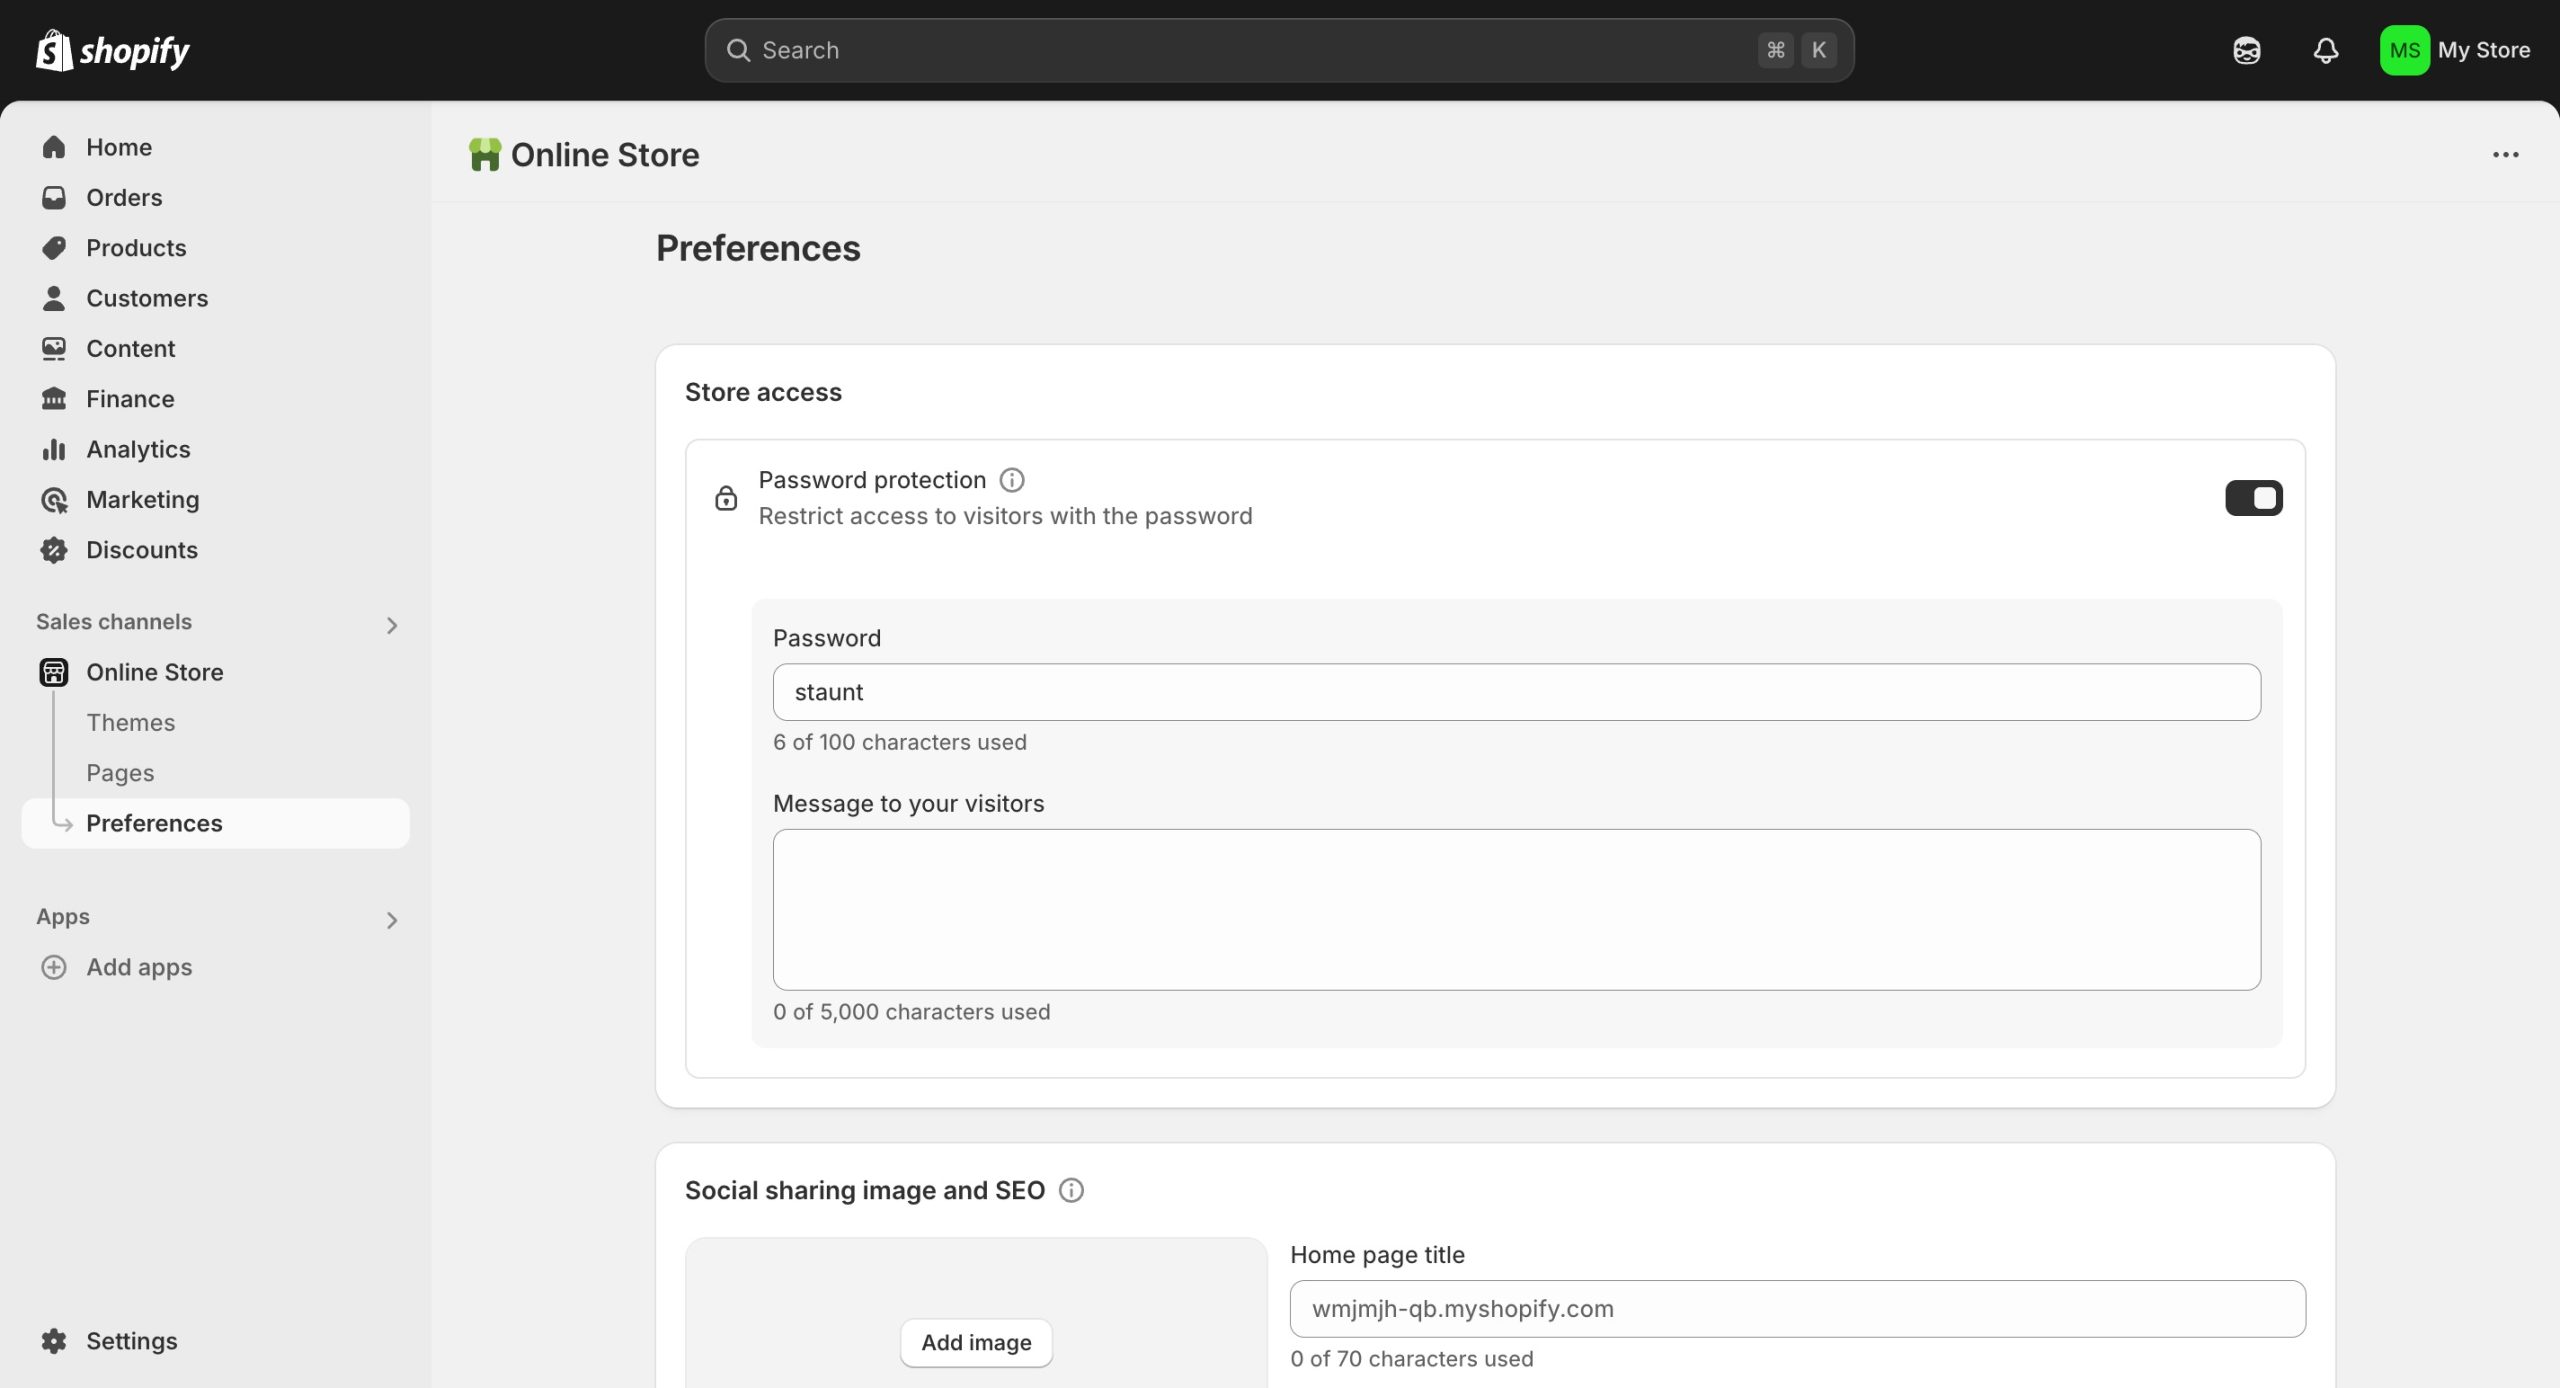
Once everything is fine, it’s time to launch your store.
- From Shopify admin go to Online Store
- Click Preferences
- Go to the Password Protection Section, there is an option Restrict Access to Visitors with the Password
- Save
Congratulations, your Shopify Store is officially live and ready for users. By following these steps, you can create a Shopify store for sportswear or fitness brands. The steps are common and can be followed to start any Shopify store.
How Much Time Does Shopify Store Setup Take?
The time to build a website with Shopify completely depends on various factors like your familiarity with the platform, how complex your store is, the customization you are performing, the number of products you are adding, and more.
Ideally it should take 4-5 days to set up a basic online store with all content and products. But the improvement and optimization of your store is an ongoing process. That is going to be there. You can always take help from experts, as the cost to hire a Shopify expert is not much.
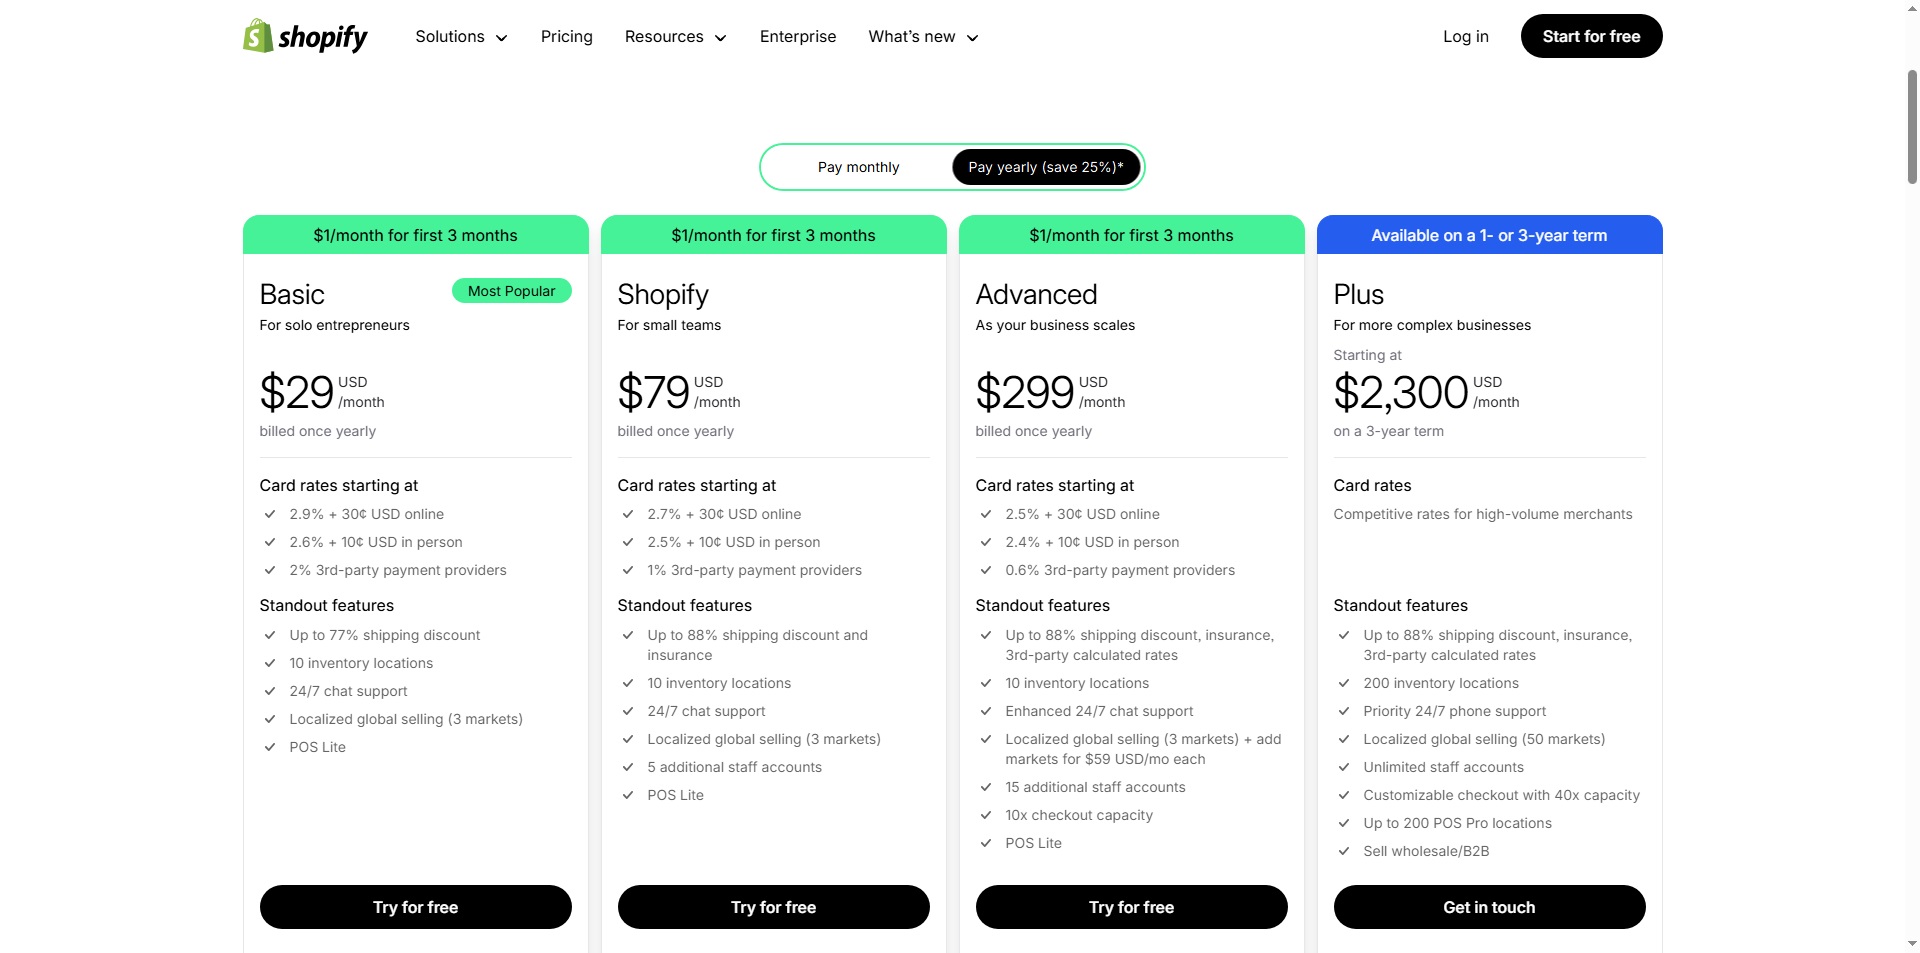
Cost to Start a Shopify Store?
Shopify has various pricing plans for different levels of stores:
1. Basic: $29/month
2. Shopify: $79/month
3. Advanced: $299/month
4. Plus: $2,300/month
Charges on per sold item
For Basic:
2.9% + 30¢ USD for online transaction
2.6% + 10¢ USD for in person payment
2% third party transaction fees
For Shopify
2.7% + 30¢ USD for online transaction
2.5% + 10¢ USD for in person payment
1% third party transaction fees
Advanced
2.5% + 30¢ USD for online transaction
2.4% + 10¢ USD for in person payment
0.6% third party transaction feed
Plus
Competitive rates for high volume merchants
Build Your Shopify Store with the Help of Shopify Expert from Expert Village Media!
Expert Village Media is a leading Shopify website development company, helping brands achieve their business goals. With 13+ years of experience in Shopify web development, app development, Shopify SEO, paid ads, and more, we have served 2000+ clients.
We know the process of building your own store can be hectic, our Shopify expert can help you with Shopify store setup service, custom theme development, app integration, platform migration, search engine marketing, web speed optimization, and more. Our Shopify experts will create a Shopify store that will rank on search engines, bring you traffic, and bring you more business. Drop an email at info@expertvillagemedia.com and our experts will get back to you. Let’s discuss your success.

Amit Porwal
CEO and FounderAmit Porwal is the CEO and Founder of Expert Village Media and Wiser AI . He’s passionate about e-commerce, and loves helping Shopify store owners boost sales with upselling, cross-selling, digital marketing, & personalized shopping experiences. With years of experience in e-commerce web development Amit believes in building simple and effective online store that actually make a difference. He is always excited to talk about the power of personalization and how he can make e-commerce smarter and more customer-friendly with the help of AI.